You can use OpenID Connect single sign-on with Management Center.
Set up the OpenID Connect security provider
To set up OpenID Connect, you need to configure settings either in the UI or the hz-mc conf tool.
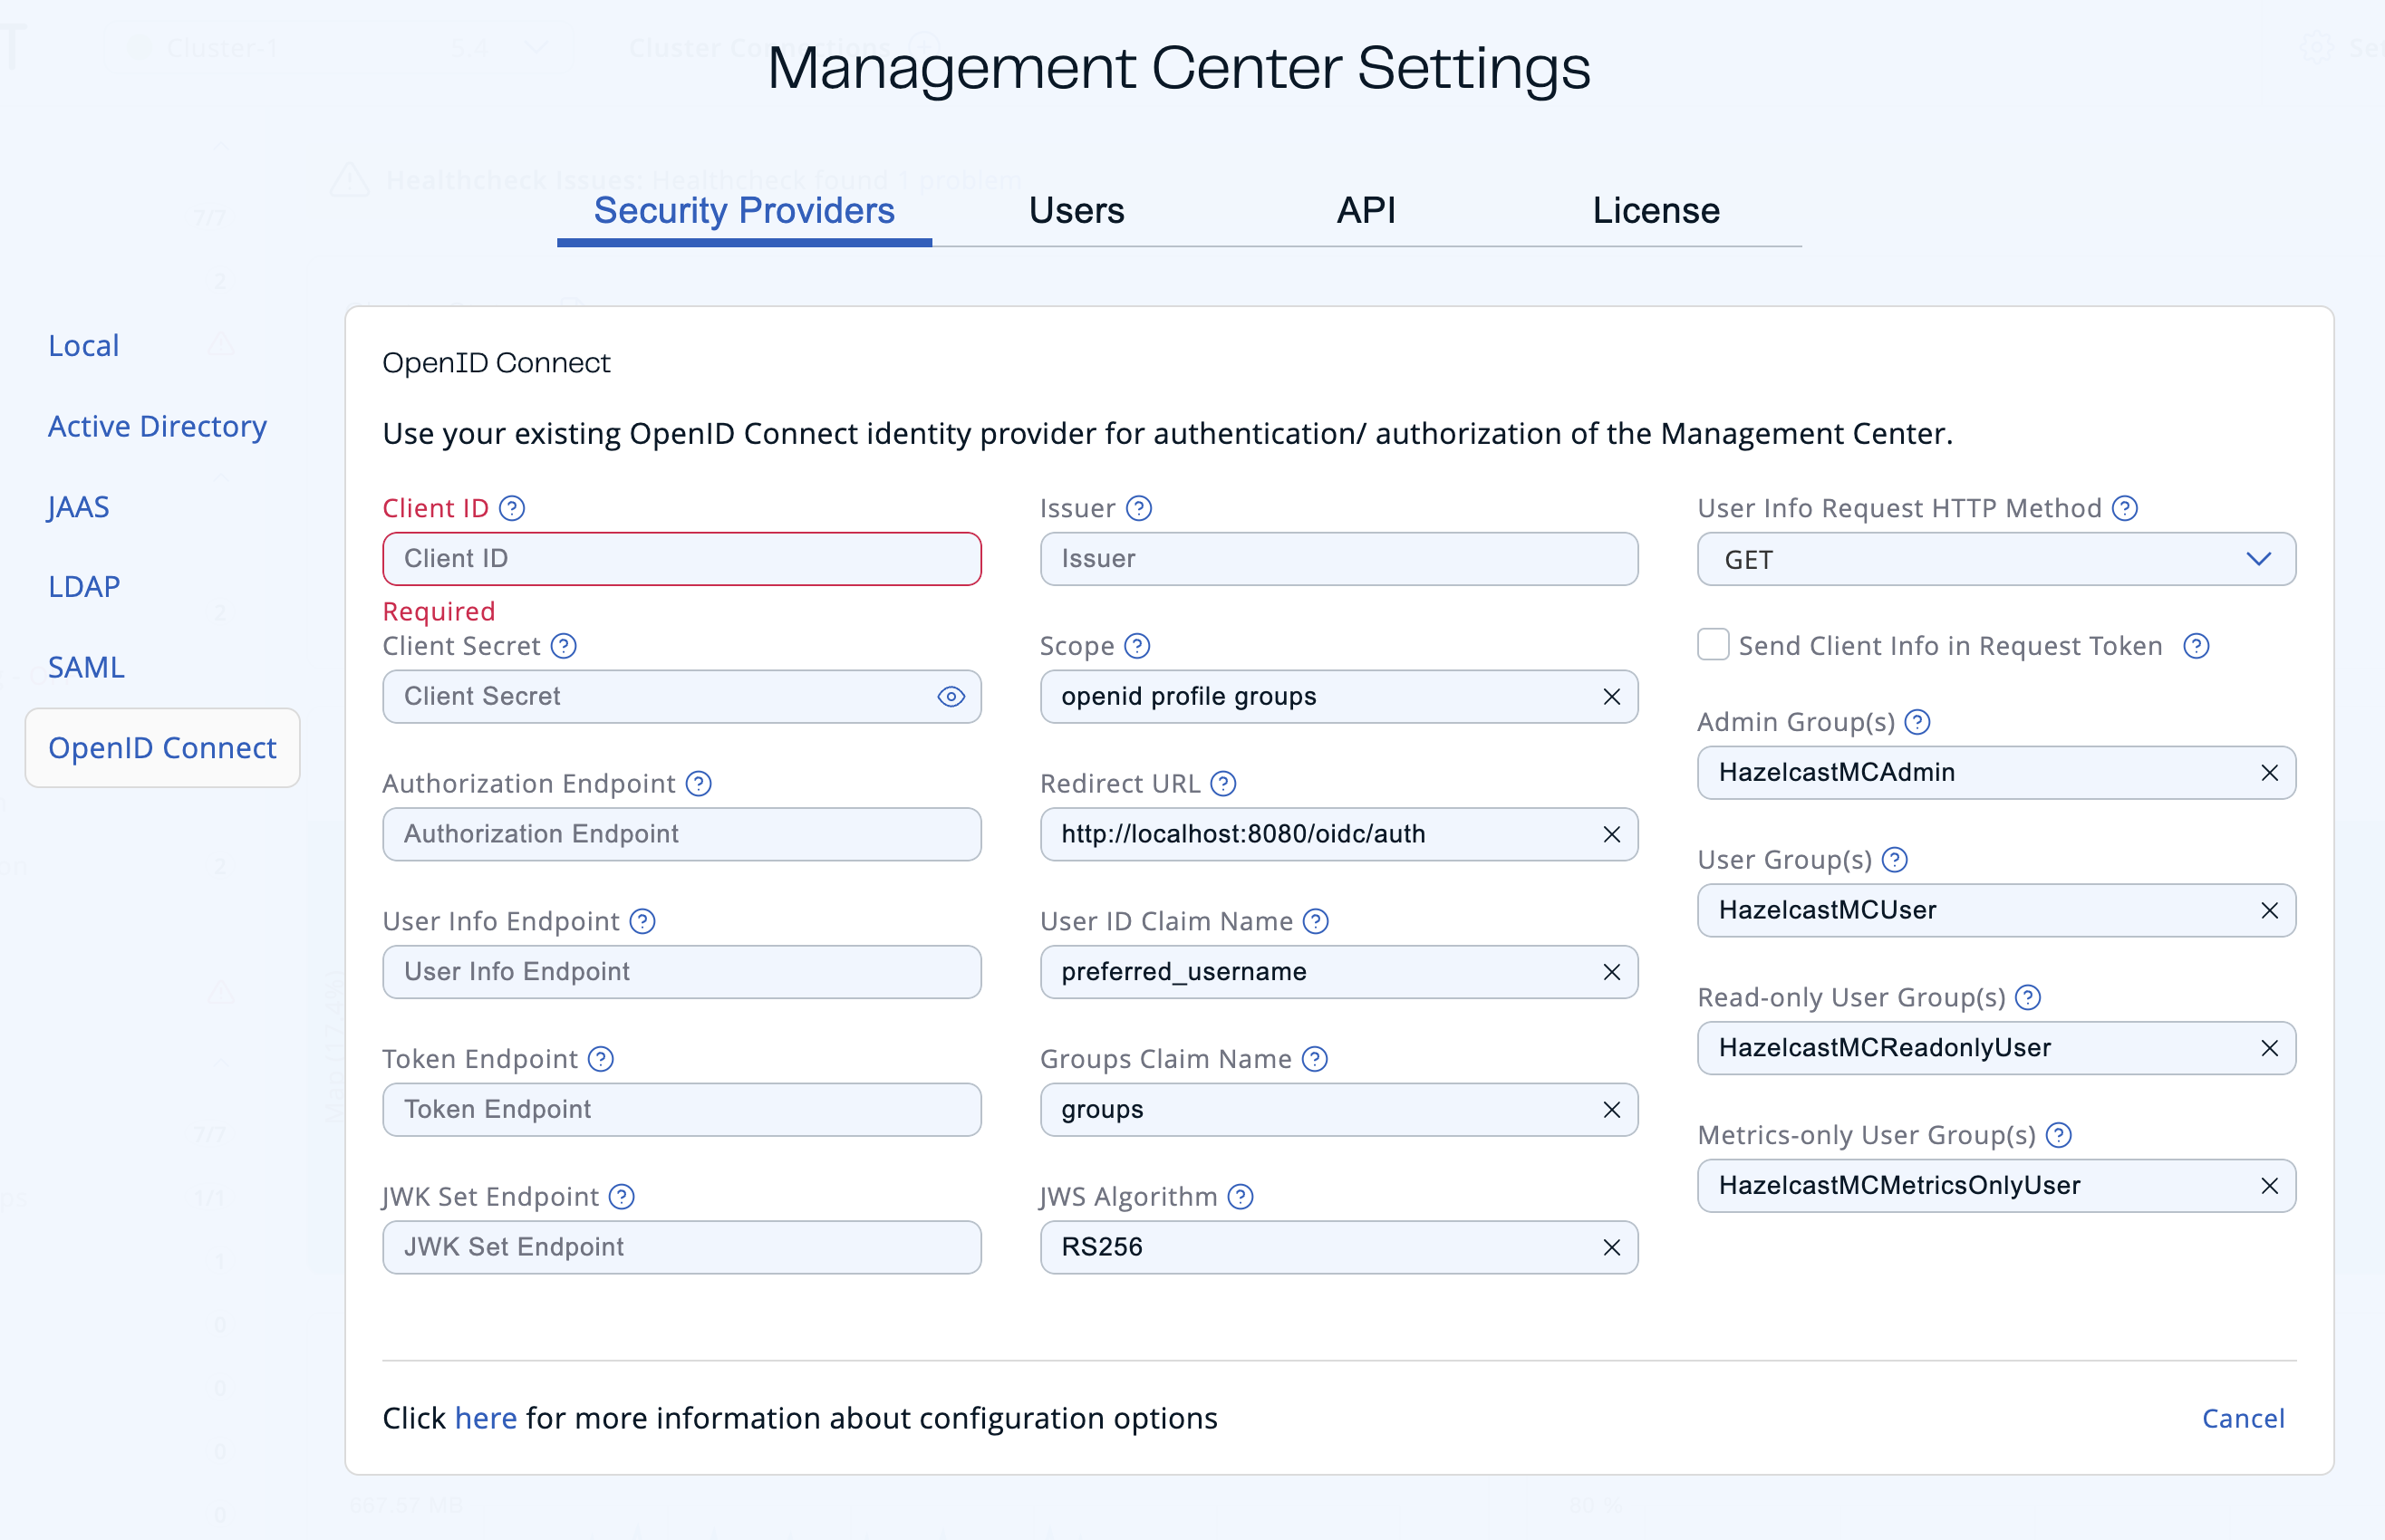
Go to Settings > Security Providers > OpenID Connect.
Use the oidc configure task. For help, use the -h flag or see Management Center Configuration Tool.
hz-mc conf oidc configuremc-conf.bat oidc configure-
Issuer: Identifies the issuer of your OpenID provider. It is usually (but not always) a URL. When an issuer URL is provided, you can fetch the OIDC configuration by clicking the
Fetch Configurationbutton.Fetching the configuration overrides any previously typed values (Authorization Endpoint, User Info Endpoint, Token Endpoint and JWK Set Endpoint). -
Client ID: The OAuth2 client ID that you obtain from your OpenID provider.
-
Client Secret: The OAuth2 client secret you obtain from your OpenID provider.
-
Authorization Endpoint: Authorization endpoint URL of your OpenID provider.
-
User Info Endpoint: User info endpoint URL of your OpenID provider.
-
Token Endpoint: Token endpoint URL of your OpenID provider.
-
JWK Set Endpoint: JWK set endpoint URL of your OpenID provider.
-
Redirect URL: URL of the Management Center endpoint that handles responses to authentication requests, including schema (
http://orhttps://) and port. It is located under the path/oidc/auth, so you should append/oidc/authto the Management Center URL. Your OpenID provider should have access to this URL as it will post back responses to authentication requests to this URL. For example, if Management Center and the OpenID provider are on the same machine, you would enter “http://127.0.0.1:8080/oidc/auth”. -
Groups Claim Name: Name of the claim that contains group(s) of the user.
-
JWS Algorithm: JWS algorithm to use.
-
UserInfo Request HTTP Method: HTTP method to use for sending a UserInfo request. Either
GETorPOST. Default value isGET. Note that IBM MCM requires this to bePOST. -
Send Client Info in Token Request: Whether Management Center should send client ID and client secret as extra parameters in the token request. No by default. Note that IBM MCM requires these extra parameters in its token endpoint, so it should be Yes when deployed there.
-
Admin Groups: Members of this group have admin privileges on the Management Center. To use more than one group, separate them with the group name separator you have configured.
-
User Groups: Members of this group have read and write privileges on the Management Center. To use more than one group, separate them with the group name separator you have configured.
-
Read-only User Groups: Members of this group have only read privilege on the Management Center. To use more than one group, separate them with the group name separator you have configured.
-
Metrics-only Groups: Members of this group have the privilege to see only the metrics on the Management Center. To use more than one group, separate them with the group name separator you have configured.
| If the user has more than one authority, Management Center uses the highest one. |
Once you configure OpenID Connect, a button for single sign-on will be shown in the login page. Clicking it will start the OpenID Connect single sign-on process. If you don’t have an existing session with your OpenID provider, you will be taken to the login page of your OpenID provider. Once you log into your OpenID provider, you will be redirected back to Management Center as a logged in user.
Management Center uses the sub claim to determine the user’s ID and the preferred_username
claim to determine which username to show in the user interface. Make sure your OpenID provider returns these two claims, when asked.
|
Create and manage users
To create and manage additional users, you must register them with your OpenID Connect provider.
When creating users, be sure to give them a valid role. See User management.
Using --force to configure OpenID Connect
Use the -f / --force flag with oidc configure to make configuration idempotent:
-
If OpenID Connect is not yet configured, it is set up.
-
If OpenID Connect is already configured with the same settings, the command succeeds without making any changes.
-
If OpenID Connect is already configured with different settings, the existing configuration is overwritten without needing to run
security resetfirst. -
If a different security provider is currently active, the command fails with an error even when
--forceis used.
Next steps
For details about the hz-mc conf tool, see Management Center Configuration Tool.