This quickstart tutorial will get you started with Hazelcast Platform Enterprise Edition and take you from installation all the way through to a working three member cluster with persistence enabled.
Overview
In this tutorial, you’ll do the following:
-
Install Hazelcast Enterprise with a trial license.
-
Create a cluster with three members with persistence enabled.
-
Create a map and view the data in Management Center.
-
Restart the cluster and check the data persists.
The tutorial should take approximately 20 minutes to complete.
Step 1: Pull the Hazelcast Enterprise Edition Docker image
-
Check that Docker is correctly installed, using the following command:
docker versionIf you don’t see a version number, see the Docker docs for troubleshooting information.
-
Pull the latest Docker image
docker pull hazelcast/hazelcast-enterprise:5.5.9 -
Check that Hazelcast Platform is correctly installed, using the following command:
hz -VYou should see something like:
Version: 5.5.9
Step 2: Get your Enterprise Edition license
Hazelcast Enterprise Edition requires a license key. You can get a trial license from the Hazelcast website.
-
Complete the form on the Hazelcast website
-
Check your email for an automated email from [email protected]
-
You should have a license key that looks like:
TrialLicense#10Nodes#eyJhbGxvd2VkTmF0aXZlTWVtb3J5U2l6ZSI6MTAwLCJhbGxvd2VkTnVtYmVyT2ZOb2RlcyI6MTAsImFsbG93ZWRUaWVyZWRTdG9yZVNpemUiOjAsImFsbG93ZWRUcGNDb3JlcyI6MCwiY3JlYXRpb25EYXRlIjoxNzUyMTU0ODYzLjMxODUyNzg2MSwiZXhwaXJ5RGF0ZSI6MTc1NDY5NzU5OS45OTk5OTk5OTksImZlYXR1cmVzIjpbMCwyLDMsNCw1LDYsNyw4LDEwLDExLDEzLDE0LDE1LDE3LDIxLDIyXSwiZ3JhY2VQZXJpb2QiOjAsImhhemVsY2FzdFZlcnNpb24iOjk5LCJvZW0iOmZhbHNlLCJ0cmlhbCI6dHJ1ZSwidmVyc2lvbiI6IlY3In0=.enSTWffnYK_rBdTC7LOVISPYYaEfwdM7giv8ZBH4iq2b5vHuA5U-OswteJUmF8jHXyyo9j0oKBWkvgxe6PBKAQ==In any provided code examples in this documentation, you should replace any instances of <YOUR_LICENSE_KEY> with your specific license key.
Step 3: Create Docker network for Hazelcast
-
Create a Docker network for Hazelcast, using the following command:
docker network create hazelcast-networkYou should see a confirmation message (showing the full NETWORK ID) similar to this:
fdf9adf0a3795bfdfb6944b9816d873d30a56d5a94b6b0c0964ce3bce5ec4819If you have run this command previously (and not deleted the network), you will see confirmation that
network with name hazelcast-network already exists.
Step 4: Start a member with persistence enabled
-
To start the first member in a cluster called
hello-world, replace the <YOUR_LICENSE_KEY> placeholder and run the following Docker command:docker run \ --name first-member --network hazelcast-network \ --rm \ -e HZ_NETWORK_PUBLICADDRESS=host.docker.internal:5701 \ (1) -e HZ_CLUSTERNAME=hello-world \ -e HZ_LICENSEKEY=<YOUR_LICENSE_KEY> \ (2) -e HZ_PERSISTENCE_ENABLED=true \ -e HZ_MAP_MYDISTRIBUTEDMAP_DATAPERSISTENCE_ENABLED=true \ -v ~/persist:/opt/hazelcast/persistence \ (3) -p 5701:5701 hazelcast/hazelcast-enterprise:5.5.9 (4)1 You can replace host.docker.internalwith a specific IP address if you prefer but make sure you adjust the following code examples accordingly.2 Replace the <YOUR_LICENSE_KEY>placeholder with the Hazelcast Enterprise Edition license key from step 2.3 By default, Hazelcast creates the /opt/hazelcast/persistencedirectory to store the persisted data. However, using a Docker image, you cannot create any files inside the container. This line of the command mounts a directory on your local drive to the container, which in this case ispersistunder the home directory. This way, the container will use this local directory to save the persisted data. You need to define a separate persist mapping for each member e.g. the second member example below uses~/persist2.4 The first port number should match the port assigned in <1>. For subsequent members (e.g. second, third), you should increment the first port number but keep the second port number i.e. 5702:5701, 5703:5701.
Your first member should started, and you should see from the terminal logs that persistence is enabled:
[ INFO] [main] [c.h.i.c.o.ExternalConfigurationOverride]: Detected external configuration entries in environment variables: [hazelcast.persistence.enabled=true,hazelcast.clustername=hello-world,hazelcast.licensekey=,hazelcast.map.mydistributedmap.datapersistence.enabled=true]
[ INFO] [main] [c.h.i.h.HotRestartIntegrationService]: [LOCAL] [hello-world] [5.5.9] Created new empty hot-restart directory: /opt/hazelcast/persistence/611ffa80-b653-44b9-8cf1-f9ffa5bfa1cb
[ INFO] [main] [c.h.s.logo]: [172.18.0.2]:5701 [hello-world] [5.5.9]
Step 5: Start more members
Run each of the following Docker commands in a separate terminal, replacing the <YOUR_LICENSE_KEY> placeholders with your Hazelcast Enterprise Edition license key:
-
Open a new terminal window and run the following command to start a second member:
docker run \ --name second-member --network hazelcast-network \ --rm \ -e HZ_NETWORK_PUBLICADDRESS=host.docker.internal:5702 \ -e HZ_CLUSTERNAME=hello-world \ -e HZ_LICENSEKEY=<YOUR_LICENSE_KEY> \ -e HZ_PERSISTENCE_ENABLED=true \ -e HZ_MAP_MYDISTRIBUTEDMAP_DATAPERSISTENCE_ENABLED=true \ -v ~/persist:/opt/hazelcast/persistence \ -p 5702:5701 hazelcast/hazelcast-enterprise:5.5.9 -
Open another new terminal window and run the following command to start a third member:
docker run \
    --name third-member --network hazelcast-network \
    --rm \
    -e HZ_NETWORK_PUBLICADDRESS=host.docker.internal:5703 \
    -e HZ_CLUSTERNAME=hello-world \
    -e HZ_LICENSEKEY=<YOUR_LICENSE_KEY> \
    -e HZ_PERSISTENCE_ENABLED=true \
    -e HZ_MAP_MYDISTRIBUTEDMAP_DATAPERSISTENCE_ENABLED=true \
    -v ~/persist:/opt/hazelcast/persistence \
    -p 5703:5701 hazelcast/hazelcast-enterprise:5.5.9
You should see all three members forming a cluster, with confirmation that looks like:
Members {size:3, ver:3} [
	Member [host.docker.internal]:5701 - d1917f97-49b4-4e8e-b8df-ab541c6c681b this  (1)
	Member [host.docker.internal]:5702 - ed7d90a0-1819-40fc-a0fb-da64a43d9269
	Member [host.docker.internal]:5703 - a7f2f072-cb1f-4c15-88b3-6dbefa212bb0
]| 1 | The this label at the end of the line indicates the current member i.e. this example shows Hazelcast logs from the first member's perspective. |
Step 6: Create a map
In this step, you'll create a map called mydistributedmap with three entries.
-
In a new terminal window, use the following code to start the SQL shell:
docker run --network hazelcast-network -it --rm hazelcast/hazelcast-enterprise:5.5.9 hz-cli --targets [email protected] sql -
Create the map:
CREATE MAPPING mydistributedmap TYPE IMap OPTIONS ('keyFormat'='varchar','valueFormat'='varchar'); -
Add data to the map:
SINK INTO mydistributedmap VALUES ('1', 'John'), ('2', 'Mary'), ('3', 'Jane'); -
Exit the SQL shell using the
exitcommand.
Step 7: View the map in Management Center
-
Open another new terminal and start Management Center using the following command:
docker run \ --network hazelcast-network \ -p 8080:8080 hazelcast/management-center:5.9 -
In a web browser, go to
localhost:8080and enable Dev Mode. -
You should now see a Cluster Connections screen.
-
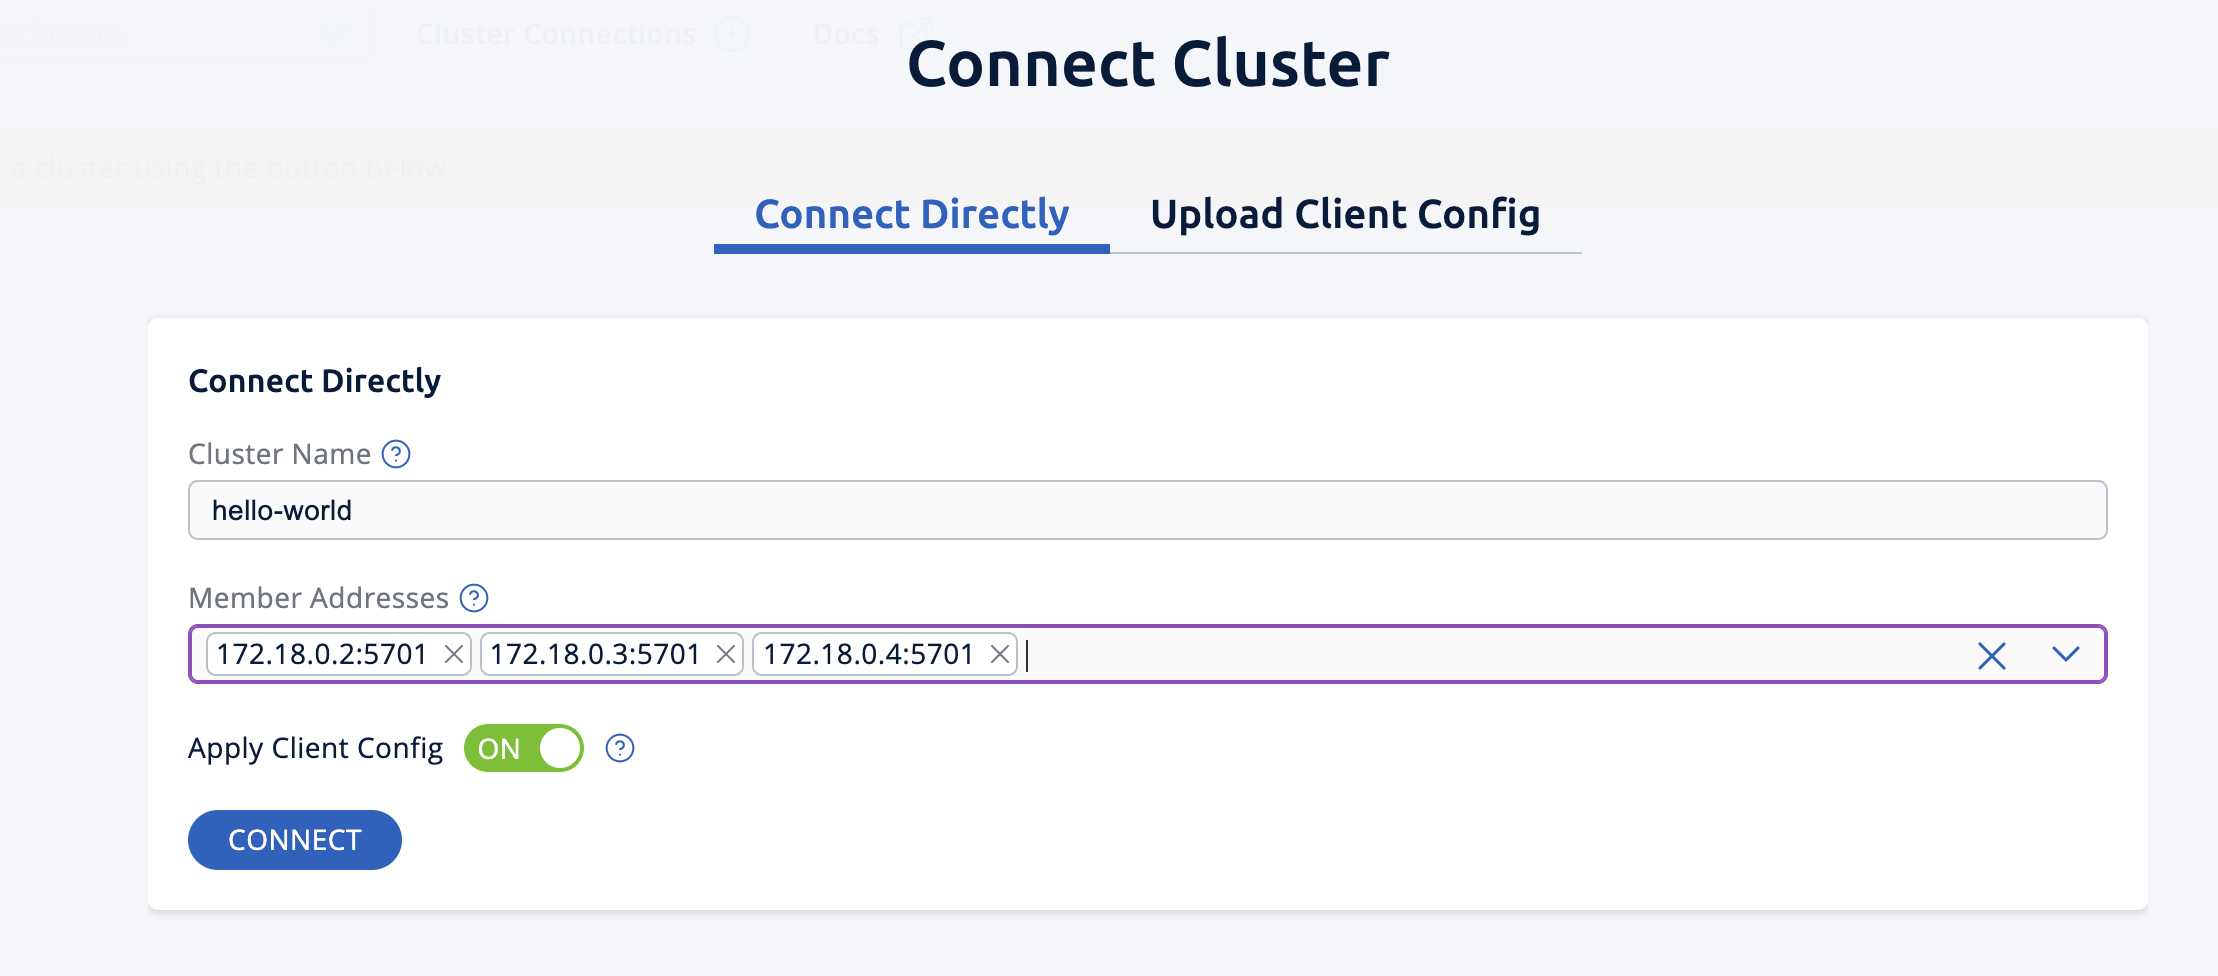
Click Connect Cluster.
-
Enter a Cluster Name of
hello-world. -
Enter a Member Address of
host.docker.internal:5701. -
Click Connect to connect to the cluster.
-
-
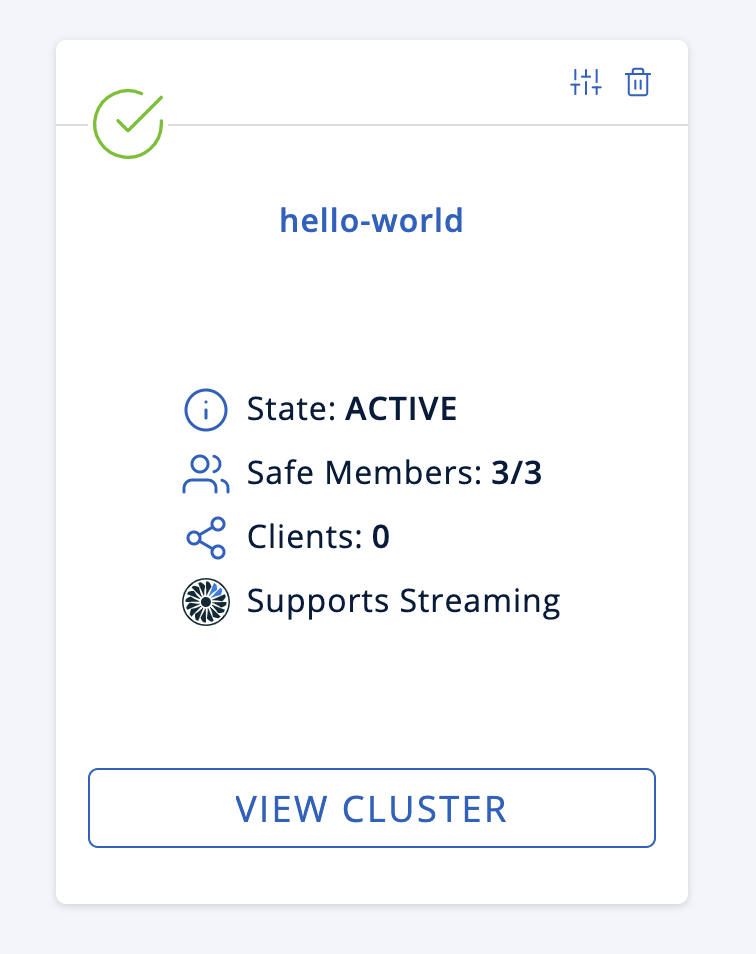
You may have to wait 10 seconds or so for the cluster to show as active and with three members.
-
Click View Cluster and go to Storage > Maps. You’ll see the map you created has data with three entries. If you want to view the details for
mydistributedmap, enable the Map Statistics box.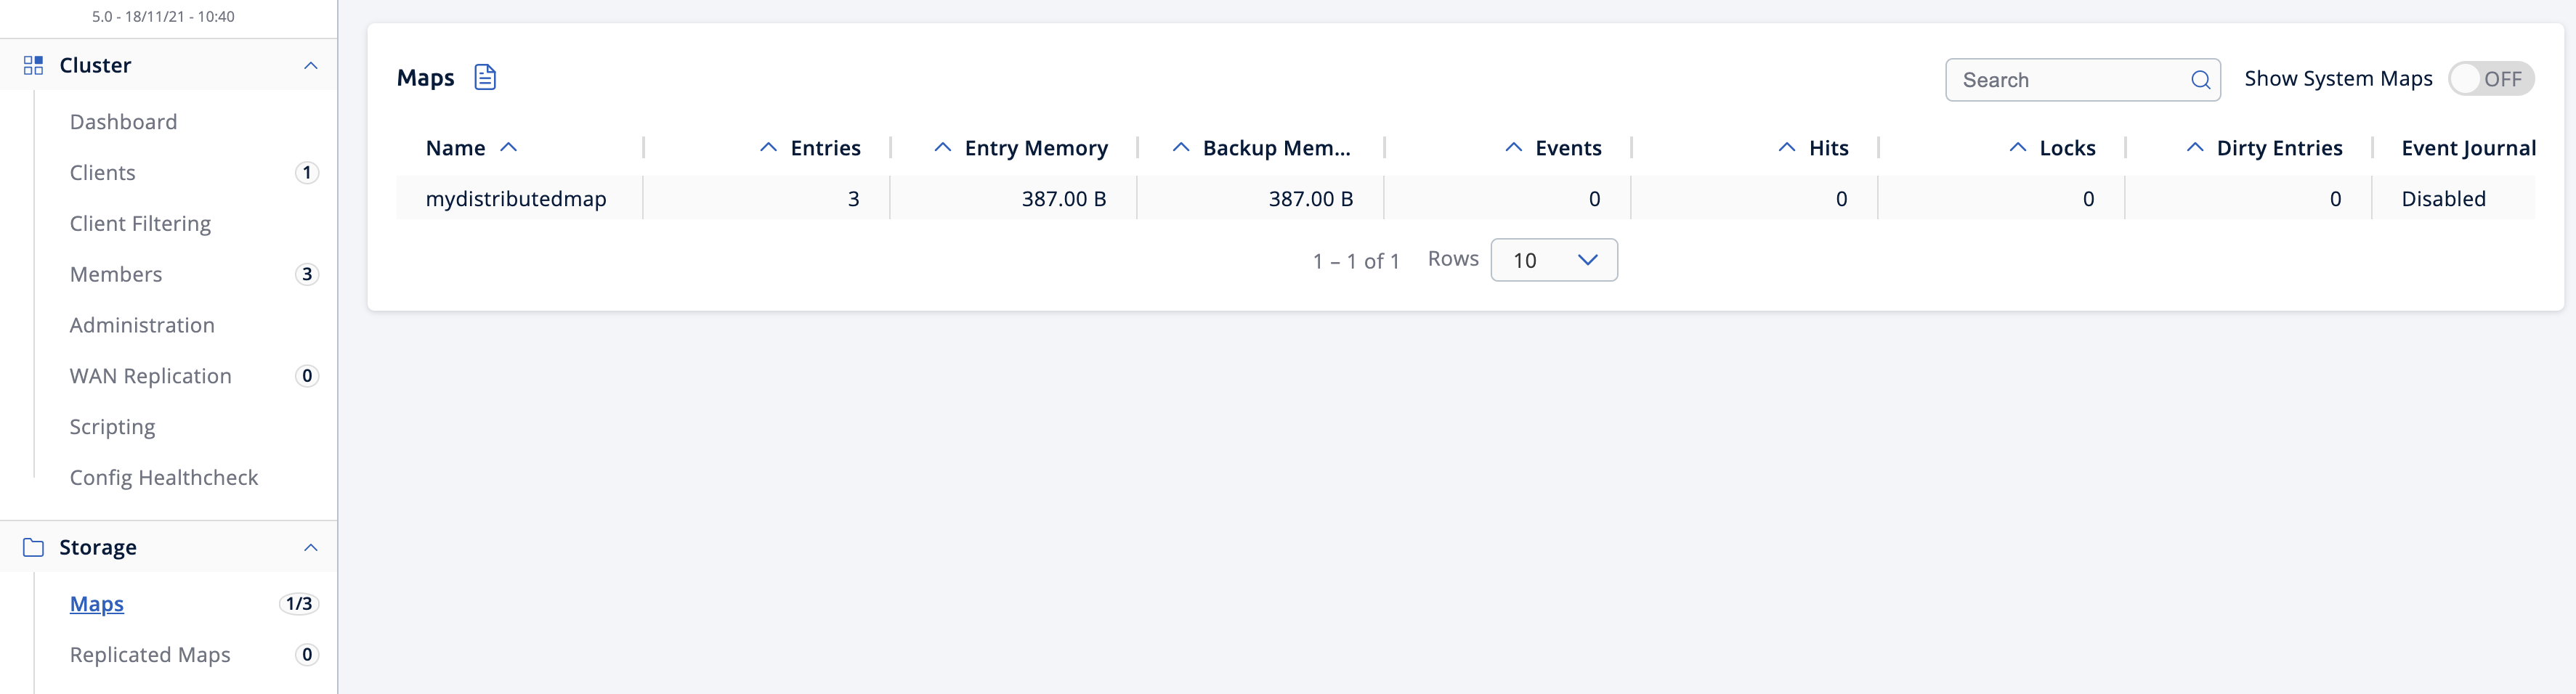
Step 8: Restart the cluster
-
Go to Cluster > Administration, and select the Cluster State tab.
-
Click Shutdown and confirm the dialog that appears.
Management Center should now show it is disconnected from the cluster, which you can confirm by checking your terminal windows, which will show the members exited to shell and similar output to:
2025-07-18 15:21:50,538 [ INFO] [hz.eloquent_cannon..clusterShutdown] [c.h.i.i.Node]: [host.docker.internal]:5702 [hello-world] [5.5.6] Hazelcast Shutdown is completed in 124 ms. -
Restart the cluster by starting the members up again, by rerunning the commands in steps 4 and 5 above.
-
When the members have restarted, you can view your map data in Management Center and confirm the entries still exist. If persistence was not enabled, the data would be lost after cluster shutdown.
Step 9: Clean up
-
Repeat the steps above to shut down the cluster
-
To delete the persist directories created above, use the following command:
rm -rf ~/persist*
Summary
In this tutorial, you learned how to:
-
Deploy Hazelcast Enterprise Edition with persistence enabled.
-
Create a simple Hazelcast map using SQL.
-
View the data in Management Center.
-
Restart the Hazelcast cluster and check the data persists.