Follow this five-minute tutorial to set up a Hazelcast cluster for testing or evaluation purposes. In five minutes, you will learn how to install Hazelcast with a package manager, start a local cluster with the CLI, write data to memory and visualize that data.
Step 1. Install Hazelcast
-
To install Hazelcast, use one of the following methods, depending on your operating system:
To install on macOS, use the Homebrew package manager.
brew tap hazelcast/hz brew install [email protected]-
Check that you have the GNU Wget package installed. You’ll use Wget to download the GPG keys for the Hazelcast package.
wget -VIf you do not see a version number, download and install Wget.
-
Use either of these package managers to install Hazelcast, depending on your Linux distribution:
Debianwget -qO - https://repository.hazelcast.com/api/gpg/key/public | gpg --dearmor | sudo tee /usr/share/keyrings/hazelcast-archive-keyring.gpg > /dev/null echo "deb [signed-by=/usr/share/keyrings/hazelcast-archive-keyring.gpg] https://repository.hazelcast.com/debian stable main" | sudo tee -a /etc/apt/sources.list sudo apt update && sudo apt install hazelcast=5.1.7+ .RPM
wget https://repository.hazelcast.com/rpm/stable/hazelcast-rpm-stable.repo -O hazelcast-rpm-stable.repo
sudo mv hazelcast-rpm-stable.repo /etc/yum.repos.d/
sudo yum install hazelcast-5.1.7
+
Hazelcast does not yet support any Windows package managers.
To get started with Hazelcast on Windows, you can use Docker, the binary distribution, or Java.
-
-
Check that Hazelcast is installed.
hz -VYou should see the version of both Hazelcast and the command-line client (CLI).
Step 2. Start a Local Cluster
Hazelcast clusters consist of servers that we call members. These members communicate with each other to form a distributed network. It’s these members that store and process your data.
-
To start a standalone Hazelcast member, use the following command:
hz startYou should see the following in the console:
INFO: [192.168.1.164]:5701 [dev] [5.1.7] (1)

Members {size:1, ver:1} [ (2)
	Member [192.168.1.164]:5701 - 4221d540-e34e-4ff2-8ad3-41e060b895ce this
]
1 The local IP address of your Hazelcast member followed by the default cluster name (dev) and the version of Hazelcast that you are running. 2 The size of your cluster. Here, you just have one member, so the size is 1. -
To add one more member to the cluster, open another terminal window and run the
startcommand again.hz startThe members discover each other automatically and form a two-member cluster. You should see the following in the console:
Members {size:2, ver:2} [
    Member [127.0.0.1]:5701 - e40081de-056a-4ae5-8ffe-632caf8a6cf1 this
    Member [127.0.0.1]:5702 - 93e82109-16bf-4b16-9c87-f4a6d0873080
]
These members use the default configuration, which is defined in the hazelcast.xml file. The location of this file is printed on the first line of
the output of the start command.
|
Step 3. Connect the Management Center
Management Center is a user interface for managing and monitoring your cluster.
In this step, you install and start a local instance of Management Center and connect it to your cluster.
-
To install Management Center, use one of the following methods, depending on your operating system:
To install on macOS, use the Homebrew package manager.
brew tap hazelcast/hz
brew install [email protected]
To install on Linux, you can use either of these package managers, depending on your Linux distribution: .Debian
wget -qO - https://repository.hazelcast.com/api/gpg/key/public | gpg --dearmor | sudo tee /usr/share/keyrings/hazelcast-archive-keyring.gpg > /dev/null echo "deb [signed-by=/usr/share/keyrings/hazelcast-archive-keyring.gpg] https://repository.hazelcast.com/debian stable main"| sudo tee -a /etc/apt/sources.list sudo apt update && sudo apt install hazelcast-management-center=5.1.7RPMwget https://repository.hazelcast.com/rpm/stable/hazelcast-rpm-stable.repo -O hazelcast-rpm-stable.repo sudo mv hazelcast-rpm-stable.repo /etc/yum.repos.d/ sudo yum install hazelcast-management-center-5.1.7At the moment, Management Center does not support any Windows package managers.
To get started with Management Center on Windows, use one of the other available installation option.
-
Check that Management Center is installed.
hz-mc -VYou should the version of Management Center.
-
Start Management Center.
hz-mc start -
In a web browser, go to localhost:8080 to open Managment Center.
-
On the landing page of Management Center, enable dev mode.
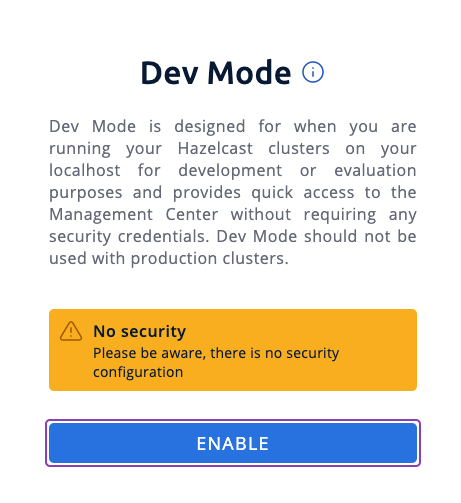
-
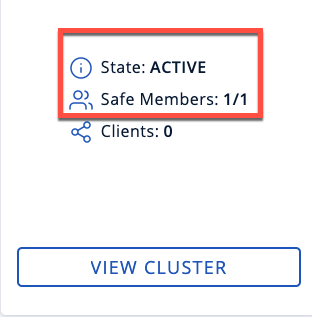
Create a connection, using the default settings.
You should see that you cluster is in an active state and has a single member. An active cluster is stable and operating without restrictions.
Step 4. Write Data to Memory
Hazelcast has lots of distributed data structures available for writing data to memory on your cluster. One of the most popular ways of writing data to memory is to use a distributed map. Maps store key/value pairs called entries, which are replicated and distributed across a cluster.
The quickest way to write some data to a map is to use the CLI console.
-
To start the console, use the following command:
hz-cli console -
Enter the following to create a map and write some data to it:
-
ns my-distributed-map -
m.put "1" "John" -
m.put "2" "Mary" -
m.put "3" "Jane"You’ll see that each of the
m.putlines returnsnull, which means that the data was written to the map.
-
-
In Management Center, go to Storage > Maps.
You should see that your cluster has a map called
my-distributed-mapwith three entries (keys and values). You’ll also see the total amount of memory that those entries are taking up in your cluster.
Next Steps
In this quickstart, you have learnt how to start a local cluster, write data to it and visualize that data in Management Center. To continue your journey through Hazelcast, check the following resources:
-
See the Getting Started section for a complete introduction to Hazelcast.
-
Learn more about the map data structure.
-
Find out more about how members automatically discover each other in Discovery Mechanisms.
-
Explore Management Center.
-
Get started with one of the available client libraries:
-
Go straight into deploying a production-ready cluster with our production checklist.
If you need some help, reach out via support.