"Manage Clusters" is the first page that appears after you login to Management Center for the first time. It is used to add, remove or edit cluster configurations, and looks like the following:
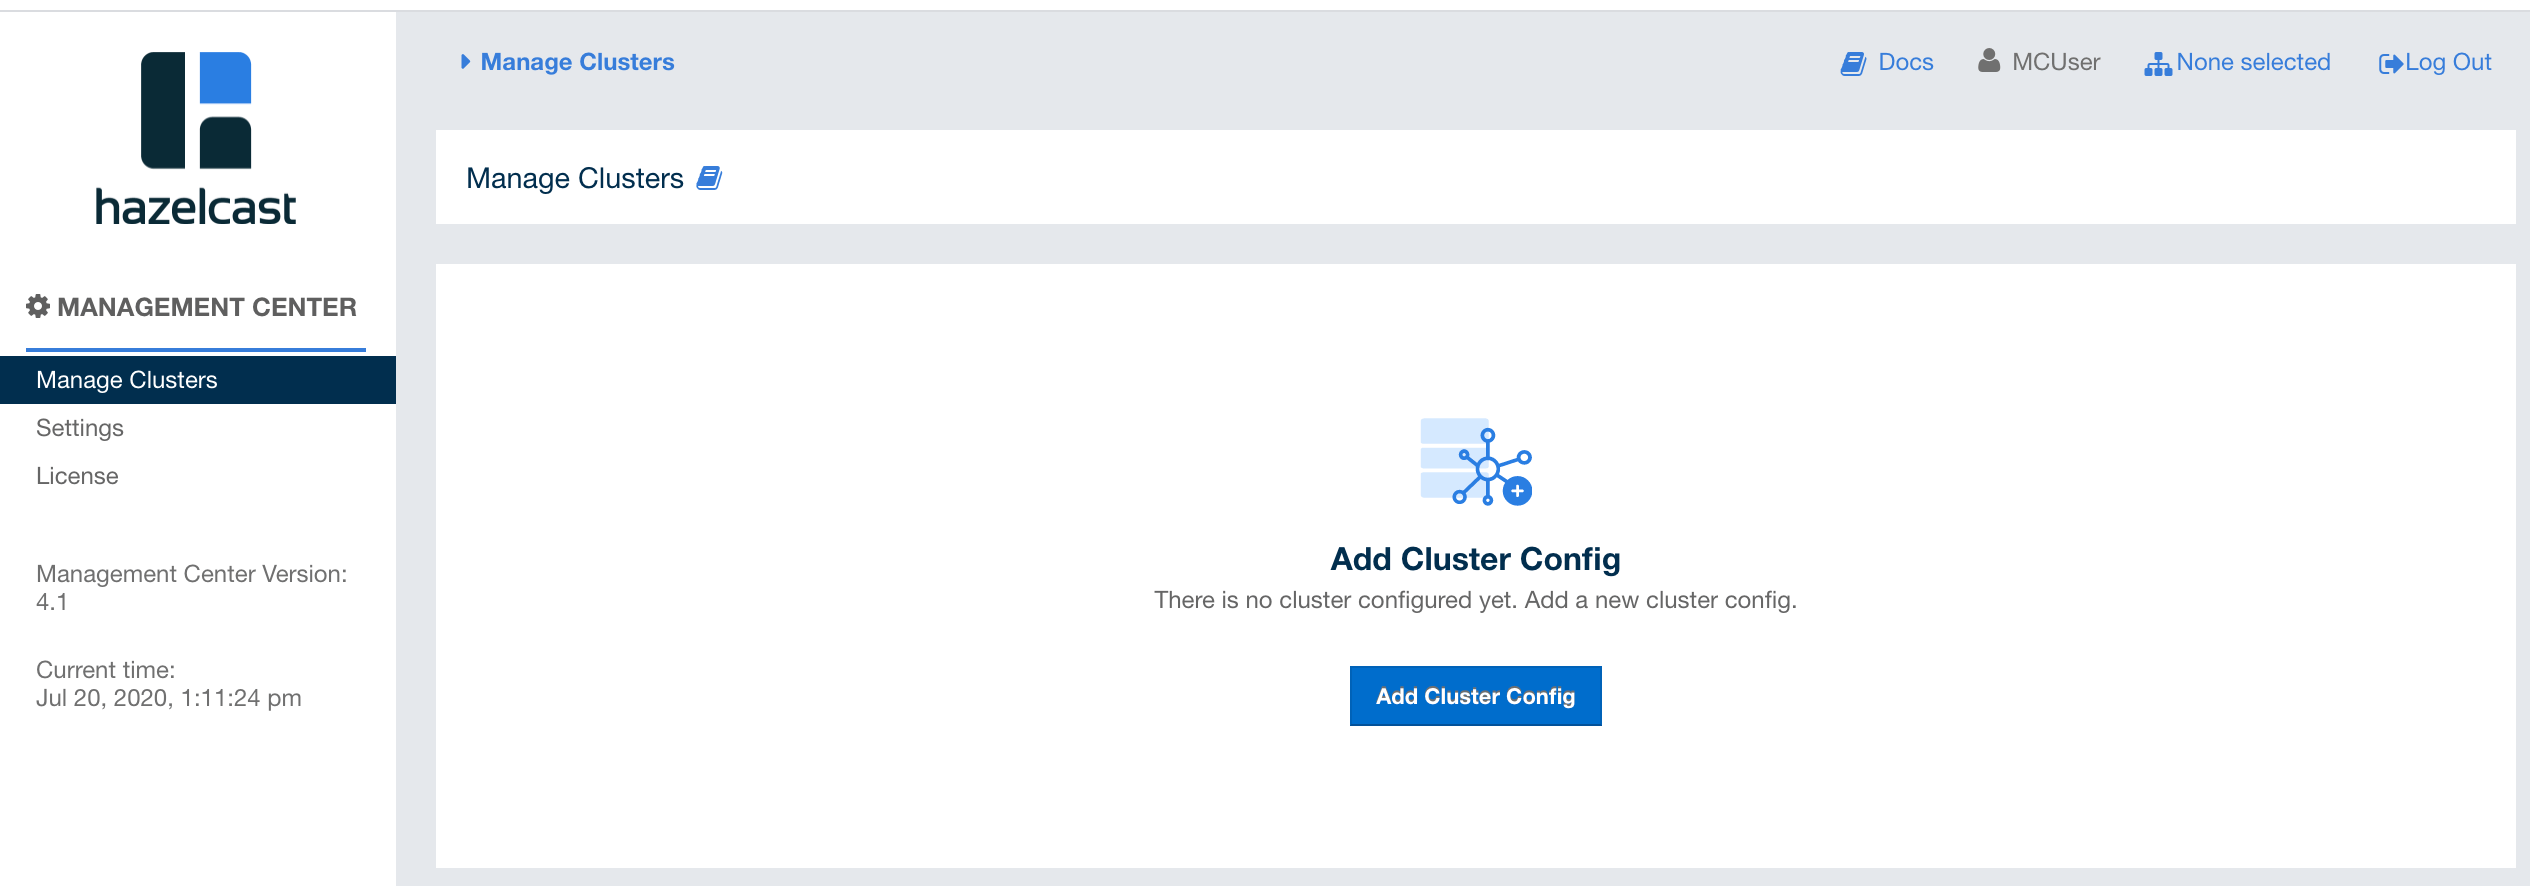
If you are using Management Center for the first time, you need to add your cluster’s configuration using this page You can always go to this page during your Management Center usage by clicking on the "Manage Clusters" menu item under the "Management Center" parent menu heading.
To start monitoring your cluster you have already created (on your local machine, another development environment, etc.) you need to first define a cluster configuration to connect Management Center to your cluster. After you click on the "Add Cluster Config" button shown in the above screenshot, you can do this by either of the following options:
-
Using a form by providing the cluster name and member addresses
-
Uploading a configuration file
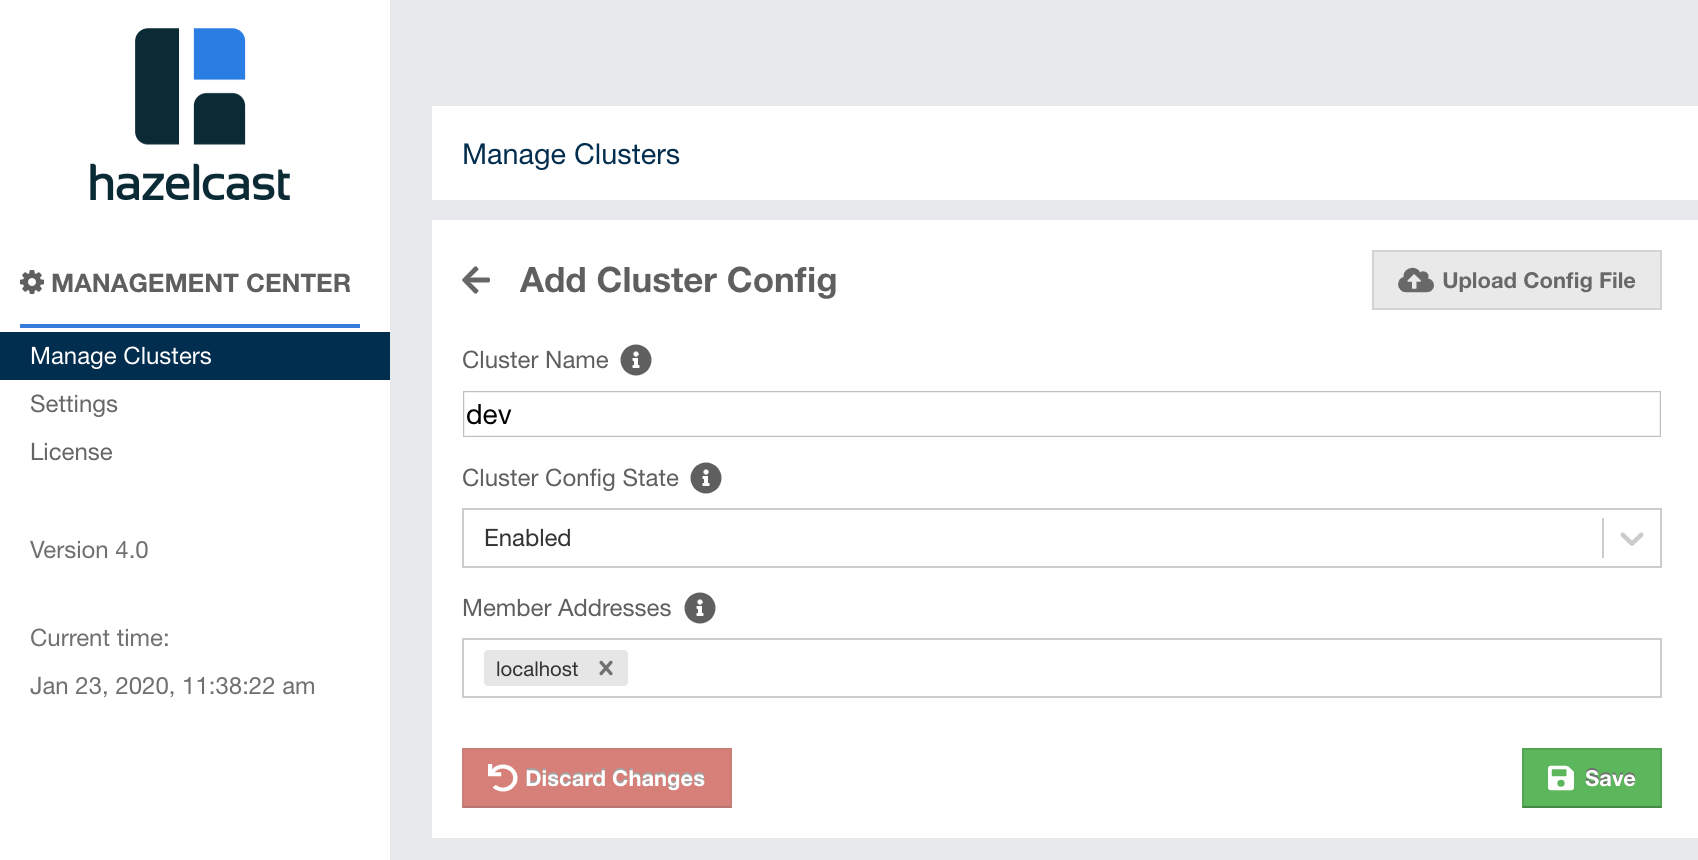
Creating a Cluster Configuration Using Form
Click on the "Add Cluster Config" button as seen in the above screenshot. The following page appears:
-
Cluster Name: Enter the name of your cluster, which was defined when the cluster was created. (The default cluster name isdevfor IMDG clusters andjetfor Jet Clusters) -
Cluster Config State: Select "Enabled" to activate the cluster configuration. You can also select "Disabled" which will create the cluster configuration in a deactivated state for use at a later time. Disabled cluster configurations are ignored until enabled. -
Member Addresses: Give the cluster members' addresses (one or preferably more) in the form ofhostname,hostname:port,IP addressorIP address:port. If no port is provided, the system tries the ports through 5701 and 5703 in a random order. Type the member address and press enter (or return) to make it visible in the "Member Addresses" field.
| As soon as Management Center connects to one of the members, it will auto-discover the other members of the cluster. It is recommended to enter more than one member address in case that member in the configuration is no longer available in the future. |
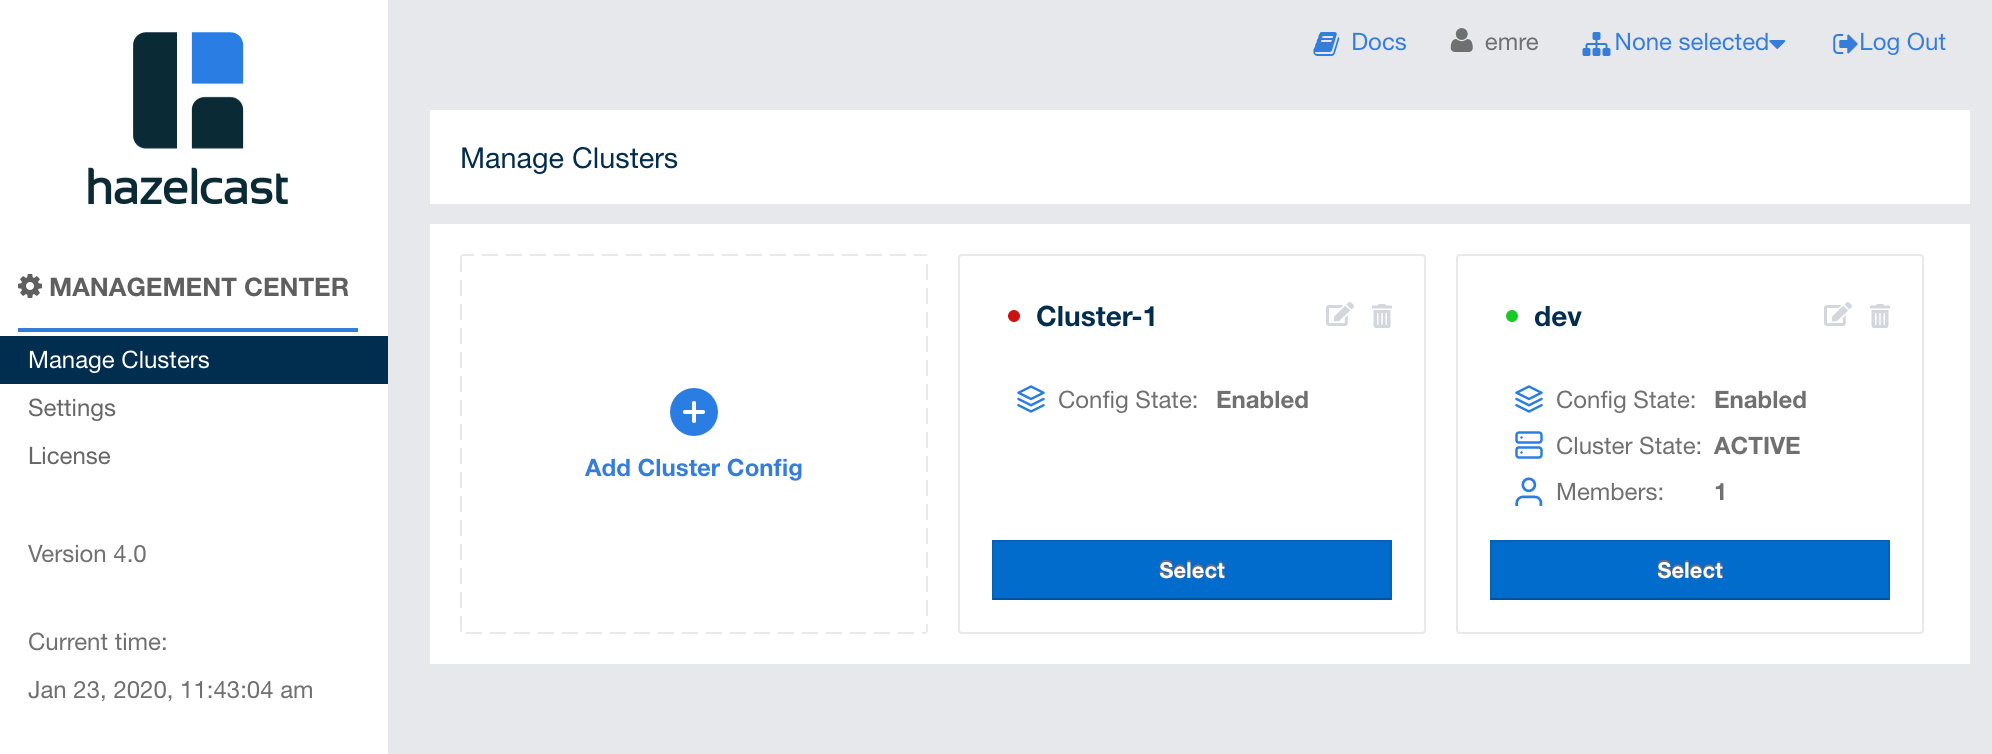
Click on the Save button and the "Manage Clusters" page loads
with the new cluster configuration added, as shown below:

Here, you can see the state of the cluster and member count. Also, at the top left of the cluster box, you see the green colored dot, meaning that Management Center is connected to your cluster.
You can add multiple cluster configurations using the same mechanism as explained above.
| When connecting to multiple clusters from the same Management Center, please ensure that the cluster names are unique. Management Center does not support simultaneous connections to more than one cluster with the same cluster name. |
The following page shows an example where Management Center is and is not able to connect one of clusters:
You can edit or delete a cluster configuration using the icons on any cluster’s box area in this page.
To see the status of a cluster, click on its
Select button. Management Center internally decides
whether the selected one is an IMDG cluster or a Jet one, and
shows the related "Dashboard" page of that cluster.
The "Dashboard" page of the
related cluster will load; see the Dashboard Page chapter
for the details. Clicking on the Select button and
selecting a cluster in the cluster selector (located at the toolbar)
have the same functionality.
Creating a Cluster Configuration by Uploading File
Alternatively, you can upload a configuration file for the
Management Center client created for your IMDG cluster. For this,
click on the Upload Config File button which is seen after
you click on the "Add Cluster Config" button.
This is the recommended method for more complex configurations.
The following page appears:
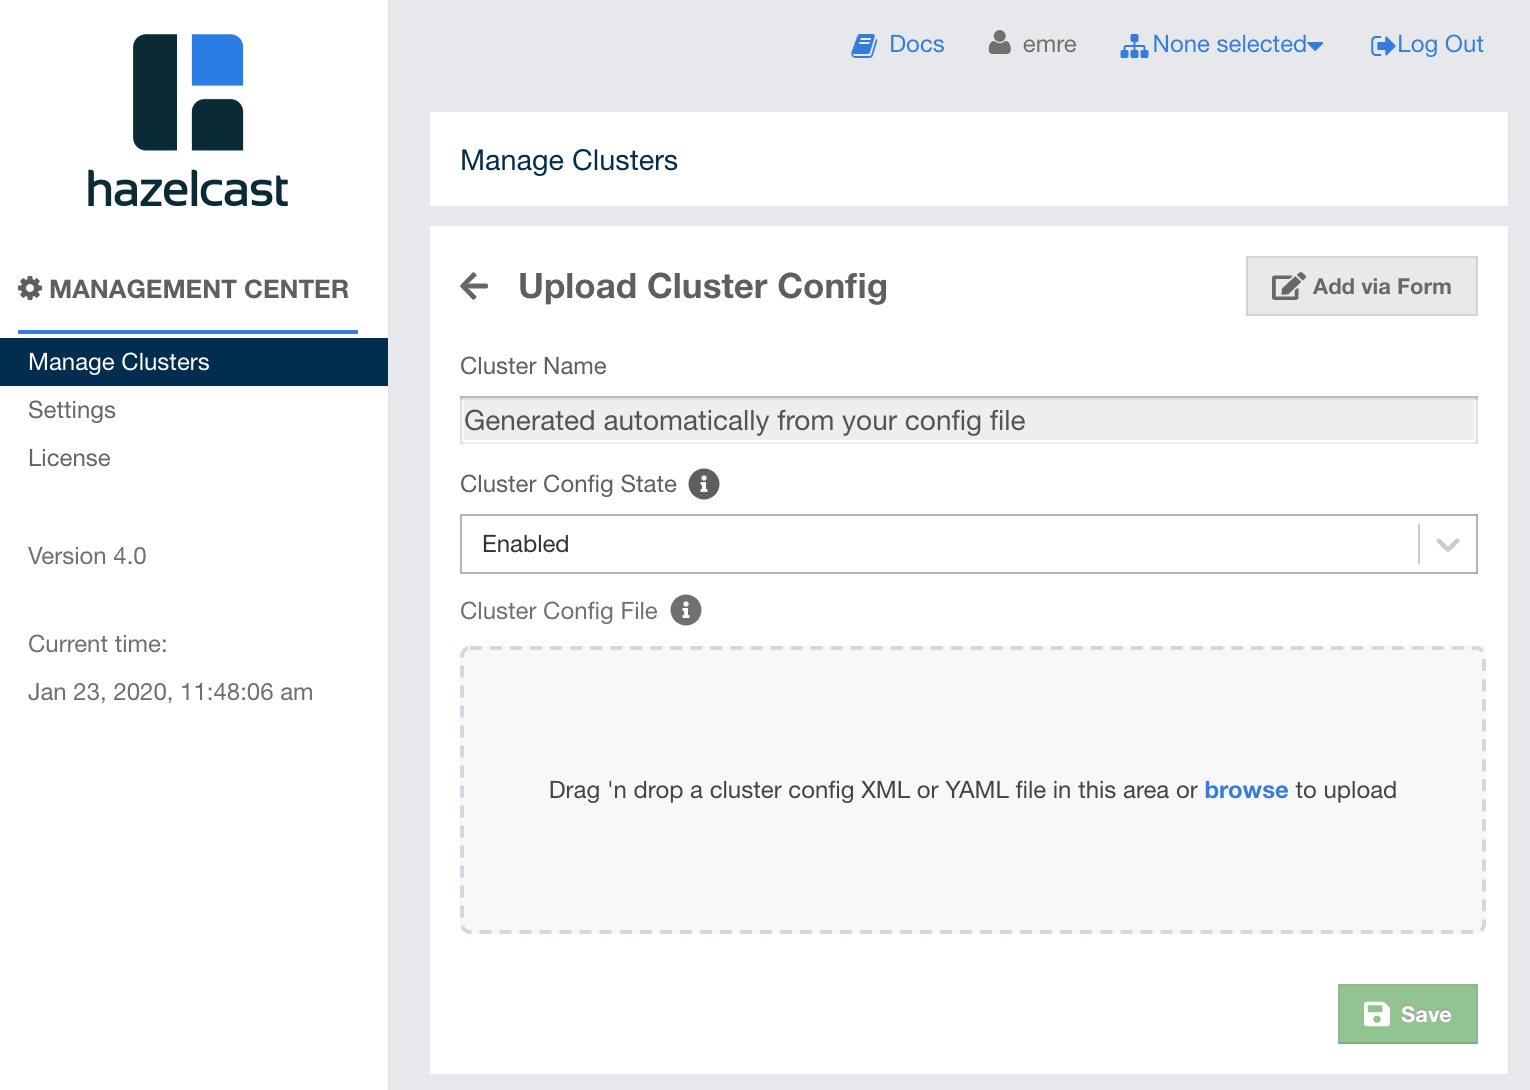
The name of your cluster will be automatically generated
as specified in the configuration file you upload. As mentioned
before in the Connecting Members chapter,
you can think of Management Center as a client that connects to your IMDG cluster you create. Therefore,
this configuration file is a well-known hazelcast.client in XML or YAML language.
Here is an example configuration file:
<hazelcast-client>
    <cluster-name>dev</cluster-name>
    <network>
        <cluster-members>
            <address>127.0.0.1</address>
            <address>127.0.0.2</address>
        </cluster-members>
    </network>
</hazelcast-client>
You can simply drag this file onto the Cluster Config File box in this page,
or find it using the browse link in the same box.
Select "Enabled" in the Cluster Config State combobox to activate the configuration.
You can also select "Disabled" just to create the configuration and use it
at a later time. In this case, the configuration is ignored until enabled.
You can always go back to the form page (explained in the previous section)
by clicking on the Add via Form on this page.