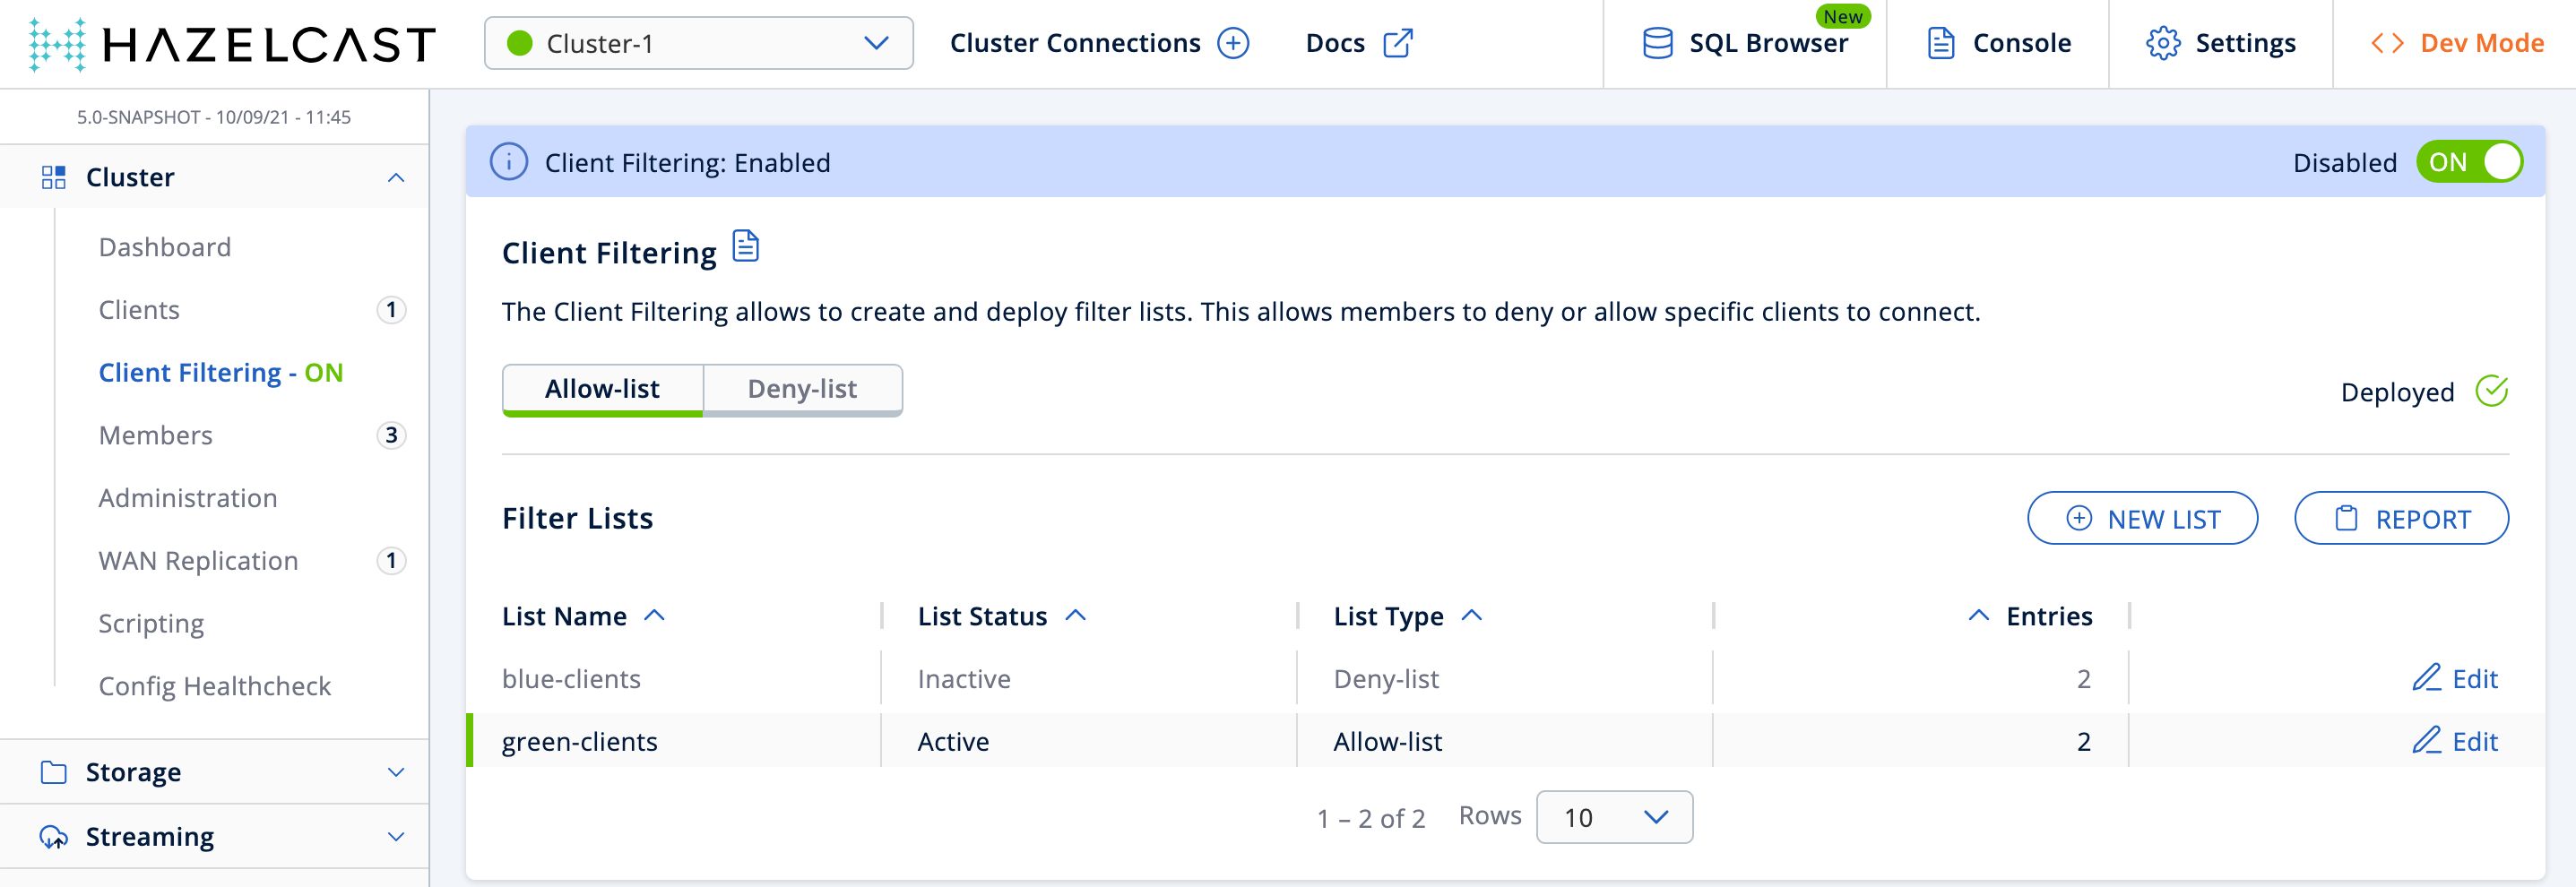
You can use the Client Filtering menu item to create filter lists that define which clients are allowed to connect to the cluster:
-
Allow-list: Clients that are allowed to connect to the cluster.
If an allow-list contains entries and a deny-list does not, all clients except those in the allow-list are denied access to the cluster.
-
Deny-list: Clients that are not allowed to connect to the cluster.
If a deny-list contains entries and an allow-list does not, all clients except those in the deny-list are allowed access to the cluster.

| Client Filtering can also be managed via MC’s Clustered REST endpoint. |
Creating a New Filter List
-
Make sure that client filtering is enabled.

-
Click the New List button.
-
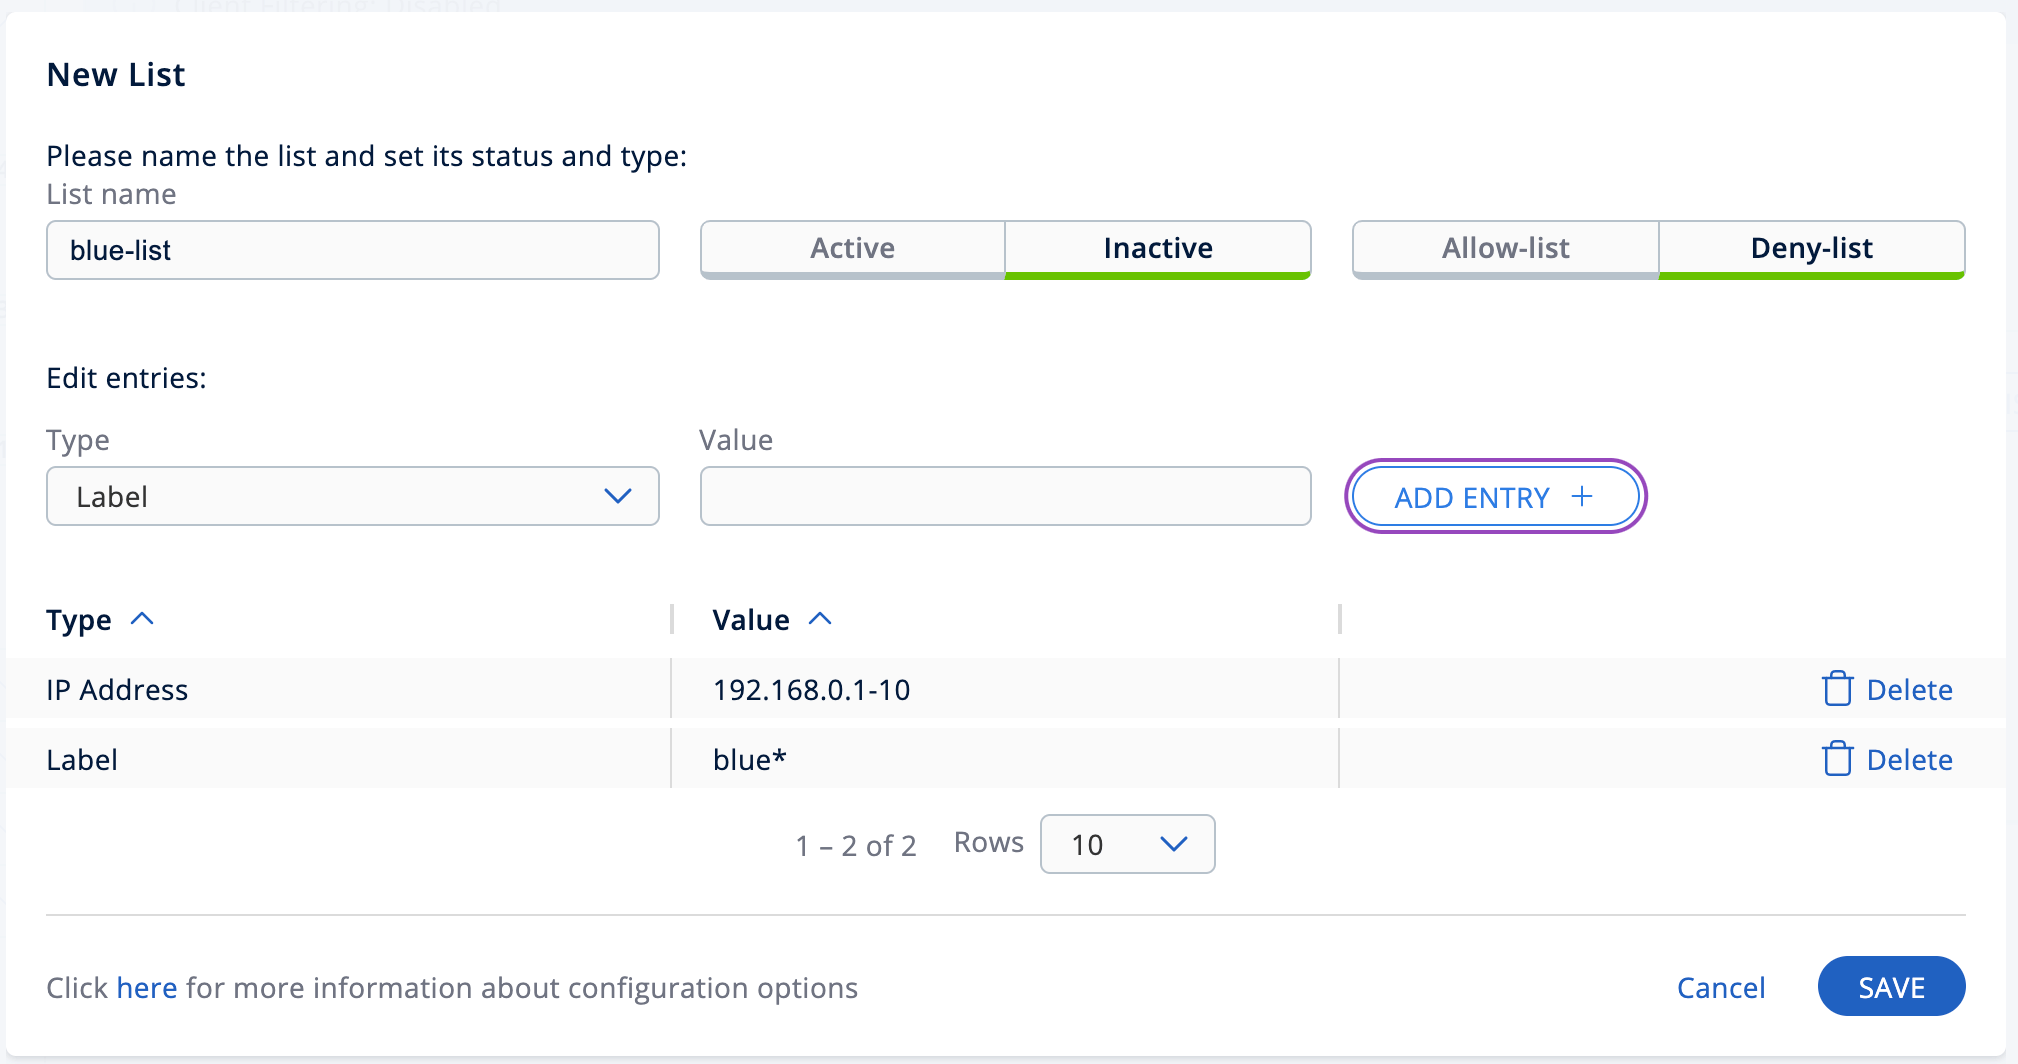
Give the list a name, a status and a type. For example, you could use the following:
Table 1. Example filter list Field Description Example List Name
Name of the filter list.
Example_allow_list
List Status
Whether the filter list is active (in use by)
Active
List Type
Whether the filter list is an allow-list or a deny-list.
Allow-list
-
In the entries section of the form, add one or more entries for the list.
Table 2. Address types Address type Description Example IP Address
IP address of a client (IPv4 or IPv6) with optional range characters (
\*and-) instead of any byte group.10.3.10.*refers to IPs between10.3.10.0and10.3.10.255. The10.3.10.4-18refers to IPs between10.3.10.4and10.3.10.18(4 and 18 included).Label
A string that matches the client label in the client’s configuration. This string can include wildcard characters (
\*). See Defining Client Labels in the Platform documentation.green*refers to any label values that start with thegreenstring.Instance Name
A string that matches the client’s name in the client’s configuration. This string can include wildcard characters (
\*).*-clientrefers to any instance name that end with the-clientstring. -
Click Save.

The orange status indicator means that the list has not yet been deployed to the cluster.
-
Click Deploy Configuration to deploy the list to the cluster.
When a cluster member receives the deployed filter list, it immediately applies the list to all currently connected clients and then uses it for newly connecting clients. Clients on the deny-list may connect to another cluster if they are configured to support blue-green deployment. If they are not, they shut down when denied access to the cluster.
If some of the cluster members are not reachable from the Management Center, those members keep using the last client list applied to them. 
-
Click Report to see the list of deployed rules from all lists.

| Wildcard rules such as blue* are displayed first. |
Editing an Existing Filter List
-
Click the Edit button on a list row.
-
Make your changes.
-
Click Save and Deploy to deploy the new list to the cluster.

Deleting an Entry
-
Click the Edit button on a list row.
-
Click Delete next to the entry.
-
Click Save and Deploy to deploy the new list to the cluster.
| If you deploy an allow-list that contains no entries, all clients are disconnected. |
Disabling an Existing Filter List
To keep a filter list saved in Management Center, but remove it from the cluster:
-
Click the Edit button on a list row.
-
Change the List Type field to Inactive.
-
Click Save.
Deleting a Filter List
To delete an entire filter list:
-
Click the Edit button on a list row.
-
Click Delete this list and deploy in the top-right corner.
Client Filtering Synchronization
If you have multiple instances of Management Center connected to the same clusters, the clusters' client filtering configuration is synchronized among all those Management Center instances. This synchronization is triggered by the following actions:
-
Clicking on the Deploy Configuration button.
-
Creating, updating, or deleting a list that is active and matches the deployed type (Allow-list or Deny-list).
| These actions override the client filtering configuration on other instances of Management Center that are connected to the same cluster. |
When Management Center connects to a cluster that already has some client filtering configuration deployed, Management Center saves the client filtering configuration from the cluster to the local persistent storage. The previous configuration stored in Management Center is overwritten.
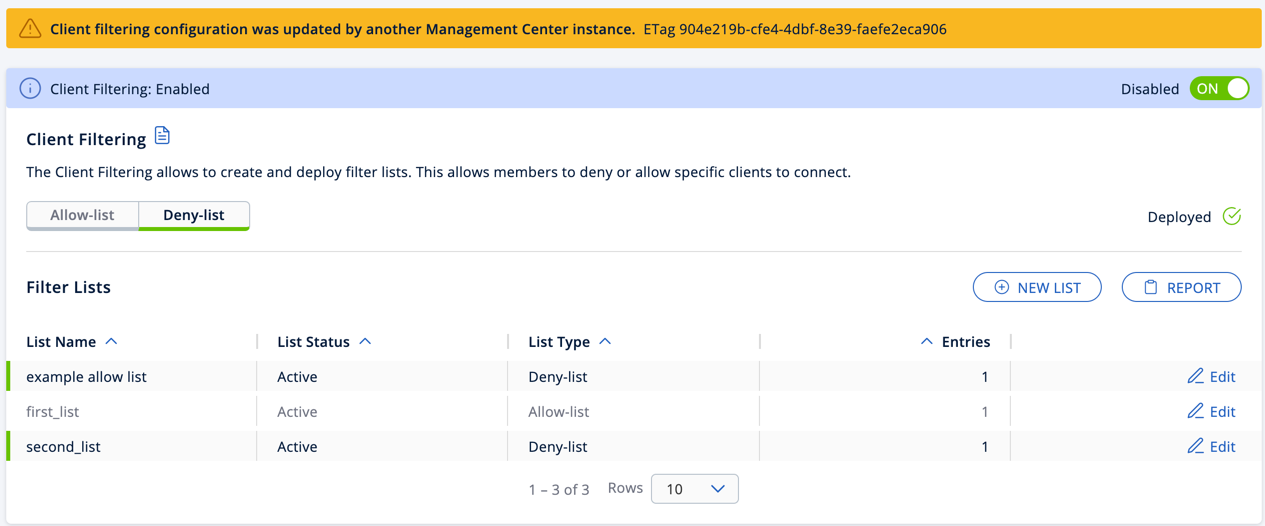
When another Management Center instance deploys a new client filtering configuration, then a message "Client filtering configuration was updated by another Management Center instance" is displayed and the Client Filtering Settings and Filter Lists data is automatically refreshed.

Related Resources
See Blue-Green Deployment and Disaster Recovery in the Platform documentation.
