This tutorial introduces you to Hazelcast in a client/server topology. At the end of this tutorial, you’ll know how to start a cluster in a single Docker host, store data in memory, visualize your data and more.
| Although running multiple members on a single Docker host is useful for testing, it’s not suitable for production. To run a physically distributed cluster in containers, see Deploy on Docker or Deploying on Kubernetes. |
Step 1: Pull the Hazelcast Docker image
-
Check that Docker is correctly installed.
docker versionIf you do not see a version number, see the Docker documentation for troubleshooting information.
-
Pull the Hazelcast Docker image:
docker pull hazelcast/hazelcast:5.7.0-SNAPSHOT
Step 2: Start a local member
Hazelcast clusters consist of servers called members. These members communicate with each other to form a distributed network. It’s these members that store and process your data in memory.
In this step, you use the Hazelcast Docker image to start a local single-member cluster called hello-world.
-
Create a new Docker network called
hazelcast-network.docker network create hazelcast-networkDocker networks make it easier for you to connect to your cluster and add other services that need to communicate with your cluster.
-
To start a member, execute the Docker
runcommand.These methods open Hazelcast members to the public. Anybody who can reach the Docker host over the network can connect to Hazelcast ports of the running members and perform actions - such as data manipulation or shutting down the members. Replace the
<host_ip>placeholder with the IP address of your Docker host.docker run \ -it \ --network hazelcast-network \ --rm \ -e HZ_NETWORK_PUBLICADDRESS=<host_ip>:5701 \ -e HZ_CLUSTERNAME=hello-world \ -p 5701:5701 hazelcast/hazelcast:5.7.0-SNAPSHOTHazelcast environment variables:
-
HZ_NETWORK_PUBLICADDRESS: The public IP address of your Docker host. -
HZ_CLUSTERNAME: The name of your cluster.Docker parameters:
-
-it: Starts an interactive session, allowing you to stop the member with Ctrl+C. -
--rm: Tells Docker to remove the container from its local cache after it exits. -
--network: Allows you to connect to clusters, using an alias. -
-p: Expose port 5701 to allow external clients to connect to the member’s Docker container.
-
You should see your cluster name in the console along with the IP address of the Docker host:

Step 3: Write data to memory
Hazelcast has lots of distributed data structures available for writing data to memory on your cluster. One of the most popular ways of writing data to memory is to use a distributed map. Maps store key/value pairs called entries, which are replicated and distributed across a cluster.
-
In a new terminal window, start the SQL shell.
Replace the
<host_ip>placeholder with the IP address of your Docker host.docker run --network hazelcast-network -it --rm hazelcast/hazelcast:5.7.0-SNAPSHOT hz-cli --targets hello-world@<host_ip> sqlThe
--targetsparameter tells the SQL shell to connect to the member at the given IP address in a cluster calledhello-world. -
Create a map and add data to it.
CREATE MAPPING my_distributed_map TYPE IMap OPTIONS ('keyFormat'='varchar','valueFormat'='varchar'); SINK INTO my_distributed_map VALUES ('1', 'John'), ('2', 'Mary'), ('3', 'Jane'); -
Exit the SQL shell.
exit
-
Add the following to your file:
import com.hazelcast.client.HazelcastClient;
import com.hazelcast.client.config.ClientConfig;
import com.hazelcast.core.HazelcastInstance;
import com.hazelcast.map.IMap;

public class MapSample {
  public static void main(String[] args) {

    ClientConfig clientConfig = new ClientConfig();
    clientConfig.setClusterName("hello-world"); (1)

    HazelcastInstance client = HazelcastClient.newHazelcastClient(clientConfig); (2)
    IMap <String,String> map = client.getMap("my-distributed-map"); (3)

    (4)
    map.put("1", "John");
    map.put("2", "Mary");
    map.put("3", "Jane");
  }
}
1 The name of the cluster that you want to connect to. 2 Create a client instance, using your configuration. 3 Create a map called my-distributed-map.4 Write some keys and values to the map.
-
Add the following to your file:
#include <hazelcast/client/hazelcast_client.h>

int main() {
  hazelcast::client::client_config config;
  config.set_cluster_name("hello-world"); (1)

  auto client = hazelcast::new_client(std::move(config)).get(); (2)

  auto map = client.get_map("my-distributed-map").get(); (3)

  (4)
  map->put<std::string, std::string>("1", "John").get();
  map->put<std::string, std::string>("2", "Mary").get();
  map->put<std::string, std::string>("3", "Jane").get();

  return 0;
}
1 The name of the cluster that you want to connect to. 2 Create a client instance, using your configuration. 3 Create a map called my-distributed-map.4 Write some keys and values to the map.
-
Add the following to your file:
using Hazelcast.Client;

namespace Hazelcast.Examples.Org.Website.Samples
{
  public class MapSample
  {
    public static void Run(string[] args)
    {
      var options = new HazelcastOptionsBuilder().Build();
      options.ClusterName = "hello-world"; (1)

      var client = await HazelcastClientFactory.StartNewClientAsync(options); (2)

      var map = client.GetMap("my-distributed-map"); (3)

      (4)
      map.put("1", "John");
      map.put("2", "Mary");
      map.put("3", "Jane");
    }
  }
}
1 The name of the cluster that you want to connect to. 2 Create a client instance, using your configuration. 3 Create a map called my-distributed-map.4 Write some keys and values to the map.
-
Install the Node.js client library.
npm install hazelcast-client -
Add the following to your file:
const { Client } = require('hazelcast-client');

(async () => {
  try {
    const client = await Client.newHazelcastClient({
      clusterName: 'hello-world', (1)
    }); (2)

    const map = await client.getMap('my-distributed-map'); (3)

    (4)
    await map.put('1', 'John');
    await map.put('2', 'Mary');
    await map.put('3', 'Jane');

  } catch (error) {
    console.error('Error occurred:', error);
  }
})();
1 The name of the cluster that you want to connect to. 2 Create a client instance, using your configuration. 3 Create a map called my-distributed-map.4 Write some keys and values to the map.
-
Install the Python client library.
pip install hazelcast-python-client -
Add the following to your file:
import hazelcast

if __name__ == "__main__":
  client = hazelcast.HazelcastClient(
  cluster_name="hello-world", (1)
  ) (2)

  # Create a Distributed Map in the cluster
  map = client.get_map("my-distributed-map").blocking() (3)

  (4)
  map.put("1", "John")
  map.put("2", "Mary")
  map.put("3", "Jane")
1 The name of the cluster that you want to connect to. 2 Create a client instance, using your configuration. 3 Create a map called my-distributed-map.4 Write some keys and values to the map.
-
Install the Go client library.
go get github.com/hazelcast/hazelcast-go-client -
Add the following to your file:
package main

import (
  "context"
  "fmt"
  "log"

  "github.com/hazelcast/hazelcast-go-client"
)

func main() {
  ctx := context.TODO()

  cfg := hazelcast.Config{}
  cfg.Cluster.Name = "hello-world" (1)

  hz, err := hazelcast.StartNewClientWithConfig(ctx, cfg) (2)
  if err != nil {
    panic(fmt.Errorf("starting the client with config: %w", err))
  }

  mp, err := hz.GetMap(ctx, "my-distributed-map") (3)
  if err != nil {
    panic(fmt.Errorf("trying to get a map: %w", err))
  }

  (4)
  _, err = mp.Put(ctx, 1, "John")
  if err != nil {
    panic(fmt.Errorf("trying to put to map: %w", err))
  }

  _, err = mp.Put(ctx, 2, "Mary")
  if err != nil {
    panic(fmt.Errorf("trying to put to map: %w", err))
  }

  _, err = mp.Put(ctx, 3, "Jane")
  if err != nil {
    panic(fmt.Errorf("trying to put to map: %w", err))
  }
}
1 The name of the cluster that you want to connect to. 2 Create a client instance, using your configuration. 3 Create a map called my-distributed-map.4 Write some keys and values to the map.
Step 4: Read data from memory
You can read the data that you just wrote to memory by connecting to the member with a different client and requesting data from the member.
-
In a new terminal window, start the SQL shell.
Replace the
<host_ip>placeholder with the IP address of your Docker host.docker run --network hazelcast-network -it --rm hazelcast/hazelcast:5.7.0-SNAPSHOT hz-cli --targets hello-world@<host_ip> sql -
Query all data in the map.
SELECT * FROM my_distributed_map;+--------------------+--------------------+ |__key |this | +--------------------+--------------------+ |3 |Jane | |1 |John | |2 |Mary | +--------------------+--------------------+ -
Exit the SQL shell.
exit
import com.hazelcast.client.HazelcastClient;
import com.hazelcast.client.config.ClientConfig;
import com.hazelcast.core.HazelcastInstance;
import com.hazelcast.map.IMap;

public class MapSample {
  public static void main(String[] args) {

    ClientConfig clientConfig = new ClientConfig();
    clientConfig.setClusterName("hello-world");

    HazelcastInstance client = HazelcastClient.newHazelcastClient(clientConfig);

    (1)
    IMap <String,String> map = client.getMap("my-distributed-map");
    for (Map.Entry<String, String> entry : map.entrySet()) {
      System.out.println(entry.getKey() + " " + entry.getValue());
    }

    client.shutdown(); (2)
  }
}| 1 | Request all data in the map and print it to the console. |
| 2 | Disconnect from the member. |
#include <hazelcast/client/hazelcast_client.h>

int main() {
  hazelcast::client::client_config config;
  config.set_cluster_name("hello-world");

  auto client = hazelcast::new_client(std::move(config)).get();

  auto map = client.get_map("my-distributed-map").get();

  (1)
  auto map = client.get_map("my-distributed-map").get();
  auto entries = map->entry_set<std::string, std::string>().get();
  for (auto &entry : map->entry_set<std::string, std::string>().get()) {
    std::cout << entry.first << " " << entry.second << std::endl;
  }

  client.shutdown(); (2)

  return 0;
}| 1 | Request all data in the map and print it to the console. |
| 2 | Disconnect from the member. |
using Hazelcast.Client;
using System;
using System.Threading.Tasks;

namespace Hazelcast.Examples.Org.Website.Samples
{
  public class MapSample
  {
    public static async Task Main(string[] args)
    {
      var options = new HazelcastOptionsBuilder().Build();
      options.ClusterName = "hello-world";

      await using var client = await HazelcastClientFactory.StartNewClientAsync(options);

      (1)
      var map = await client.GetMapAsync<string, string>("my-distributed-map");
      foreach (var entry in await map.GetEntriesAsync())
        Console.WriteLine($"{entry.Key}: {entry.Value}");

      client.Shutdown(); (2)
    }
  }
}| 1 | Request all data in the map and print it to the console. |
| 2 | Disconnect from the member. |
const { Client } = require('hazelcast-client');

(async () => {
  try {
    const client = await Client.newHazelcastClient({
      clusterName: 'hello-world',
    });

    (1)
    const map = await client.getMap('my-distributed-map');
    for (const [key, value] of await map.entrySet()) {
        console.log(`${key} ${value}`);
    }

    await hz.shutdown(); (2)

  } catch (error) {
    console.error('Error occurred:', error);
  }
})();| 1 | Request all data in the map and print it to the console. |
| 2 | Disconnect from the member. |
import hazelcast

if __name__ == "__main__":
  client = hazelcast.HazelcastClient(
  cluster_name="hello-world",
  )

  (1)
  my_map = client.get_map("my-distributed-map").blocking()
  for key, value in my_map.entry_set():
    print(key, value)

client.shutdown() (2)| 1 | Request all data in the map and print it to the console. |
| 2 | Disconnect from the member. |
package main

import (
  "context"
  "fmt"

  "github.com/hazelcast/hazelcast-go-client"
)

func main() {
  ctx := context.TODO()

  cfg := hazelcast.Config{}
  cfg.Cluster.Name = "hello-world"

  hz, err := hazelcast.StartNewClientWithConfig(ctx, cfg)
  if err != nil {
    panic(fmt.Errorf("starting the client with config: %w", err))
  }

  defer hz.Shutdown(ctx) (2)

  mp, err := hz.GetMap(ctx, "my-distributed-map") (1)
  if err != nil {
    panic(fmt.Errorf("trying to get a map: %w", err))
  }

  entries, err := mp.GetEntrySet(ctx)
  if err != nil {
    panic(fmt.Errorf("trying to get an entries of the map: %w", err))
  }

  for _, entry := range entries {
    fmt.Printf("key: %v, value: %v\n", entry.Key, entry.Value)
  }
}| 1 | Request all data in the map and print it to the console. |
| 2 | Disconnect from the member. |
Step 5: Set up Management Center
Management Center is a user interface for managing and monitoring your cluster.
In this step, you start a local instance of Management Center and use it to view your cluster’s statistics.
-
Start Management Center.
docker run \ --network hazelcast-network \ -p 8080:8080 hazelcast/management-center:latest-snapshot -
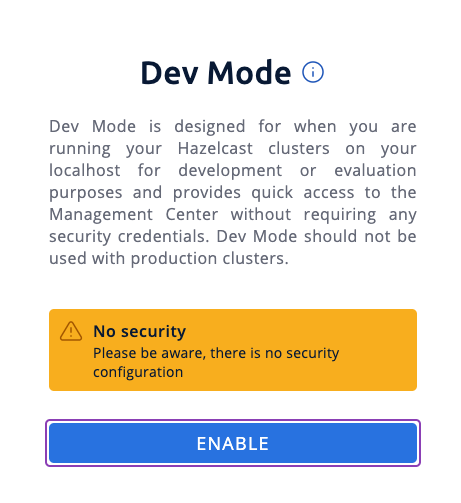
In a web browser, go to localhost:8080 and enable dev mode.
-
Enter your cluster’s name and IP address.
You should see that you cluster is in an active state and has a single member. An active cluster is one that is operating without restrictions. To learn more about cluster states, see Cluster States.

-
Click View Cluster and go to Clients.
You should see that two clients are connected to your cluster member: Management Center and the Hazelcast client that you used to write data to a map.
-
Go to Storage > Maps.
You should see that your cluster has a map called
my-distributed-mapwith three entries (keys and values). You’ll also see the total amount of memory that those entries are taking up in your cluster.
For now, the backup memory is 0 because you don’t have any other members in your cluster on which to back up your map entries.
To back up your map, you need to scale up your cluster.
Step 6. Scale your Cluster
If your cluster starts to run out of memory, you can add more members to it and they will distribute their data across the new members.
Your cluster will even create a copy of any map entries and distribute them across other members of the cluster. This way, your data is secure in case of a single member failure.
In this step, you add two more members to your cluster.
-
Open a new terminal and execute the Docker
runcommand again to start another member.Replace the
<host_ip>placeholder with the IP address of your Docker host.Each container must expose port 5701 from a different port on the host machine. On this member, port 5701 is exposed to port 5702 on the host machine. docker run \ --name my-second-member --network hazelcast-network \ -e HZ_NETWORK_PUBLICADDRESS=<host_ip>:5702 \ -e HZ_CLUSTERNAME=hello-world \ -p 5702:5701 hazelcast/hazelcast:5.7.0-SNAPSHOT -
Start another member.
Replace the
<host_ip>placeholder with the IP address of your Docker host.docker run \ --name my-third-member --network hazelcast-network \ -e HZ_NETWORK_PUBLICADDRESS=<host_ip>:5703 \ -e HZ_CLUSTERNAME=hello-world \ -p 5703:5701 hazelcast/hazelcast:5.7.0-SNAPSHOTYou should see that your members find and connect to each other automatically to form your
hello-worldcluster. You can learn more about how members do this in Discovery Mechanisms.
Running more than one member on a single host is useful for testing Hazelcast, but it’s not suitable for production. -
Back in Management Center, go to Storage > Maps again.
You should see that the backup memory is the same as the entry memory, meaning that all your map entries have now been copied and distributed among the other two cluster members.
-
To see how your map entries are distributed among members in your cluster, click my-distributed-map.

You should see that entries and their backups are distributed evenly across each member. This process is called partitioning. You can learn more about this subject in Data Partitioning and Replication.
Step 7: Simulate a member failure
If a member fails for any reason, the other cluster members use their backups to repartition the data across the remaining cluster members.
In the terminal of one of your running members, press Ctrl+C to shut down the member.
You should the Hazelcast Shutdown is completed message in the console.
In Management Center, you should also see that the amount of entry memory and backup memory has not changed. All your map entries are still in memory despite a member being shut down. The remaining Hazelcast members have repartitioned the data.
Next steps
Now that you have a local cluster, you can continue your journey with the following tutorials:
-
Get started with SQL by learning how to query data in your cluster.
-
Get started with Data Processing by learning how to use the Java Jet API.
If you just want to go straight into deploying a production-ready cluster, see Best practices.
Explore the tools Hazelcast offers for the following use cases:
If you’re interested in learning more about topics introduced in this tutorial, see the following resources: