This is a demonstration of user code namespaces. In this exercise, we will be working with a Spring Boot service that uses an entry processor to perform a basic authorization. We will then update the entry processor without restarting the cluster.
Context
User Code Namespaces (UCN) provide a container for Java classpath resources, such as user code and accompanying artifacts like property files. This provides namespace isolation to ensure that access to resources in different namespaces can be managed through configuration. Although this has several possible applications, the one we will focus on here is the ability to dynamically replace code you’ve pushed to the Hazelcast cluster, such as entry processors or executors. Prior to UCN, the only way to replace code implemented in the Hazelcast cluster was to restart the cluster, then load the new code.
Before you Begin
Before starting this tutorial, make sure you have the following installed:
-
Docker Desktop for your operating system
-
A Java IDE of your choice
-
Postman or other API testing tool
Step 1. Set Up Lab Environment
-
Copy
sample.envto.env. -
Edit
.envto include your license key. -
Build the project, then bring up the environment using Docker. We’ll start two Hazelcast instances to make it more realistic.
mvn clean install docker compose up -d --scale hz=2 -
Browse to
localhost:8080to open Management Center. Access the cluster in Dev mode, then open the cluster view. Verify that the cluster is up with two members. -
Review the cluster configuration at hazelcast.yaml.
hazelcast:
  user-code-namespaces:
    enabled: true
    card-ns: []

  jet:
    enabled: true
    resource-upload-enabled: true

  map:
    cards:
      user-code-namespace: card-ns
Note how the
card-nsnamespace is declared under theuser-code-namespaceskey and then associated with thecardsmap below. In addition to IMaps, most of the other data structures within Hazelcast can be associated with a user code namespace. You can also associate a user code namespace with a declared executor service allowing you to associate arbitrary server side code with a usercode namespace, which is cool, and potentially very useful.Underneath the declaration of the specific namespace you can see that, in the example, there is an empty list. You can statically specify resources (jars, classes) here but in this example we will specify them dynamically.
Step 2. Review the Code and Configuration
-
In your IDE, open the
TransactionEntryProcessorin thecommonproject. Review the code.The EntryProcessor will be invoked on the "cards" map which contains instances of
Card. However, as you can see the type of the entry declared in the EntryProcessor isGenericRecord. This is the recommended approach for map entries. It is not advisable to put the domain object in the user code namespace because, when the contents of the namespace changes, a new class loader will be created and Java will consider aCardloaded from one class loader to be different from aCardloaded from another class loader, even if they are in the same user code namespace. This is the genesis of the "instance of class Card cannot be cast to Card" error message. -
In your IDE, open the the
AuthorizationServiceControllerin theauthorization-serviceproject.# this code runs once at startup @PostConstruct public void init(){ // use the default instantiation process hz = HazelcastClient.newHazelcastClient(); cardMap = hz.getMap(Names.CARD_MAP_NAME); // send the TransactionEntryProcessor and Transaction classes to the cluster UserCodeNamespaceConfig ns = new UserCodeNamespaceConfig("card-ns"); ns.addClass(TransactionEntryProcessor.class, Transaction.class); hz.getConfig().getNamespacesConfig().addNamespaceConfig(ns); }Notice how the
TransactionEntryProcessorandTransactionclasses are being added to the UserCodeNamespaceConfig every time at startup. Also notice that theCardclass is not specified. If it is present in the user code namespace for the map, it will be deserialized asCardand notGenericRecord, leading to the issues mentioned above. -
Use
moreto review the contents of compose.yaml, the Docker configuration file. Note that nothing has been added to the Hazelcast class path when we start the cluster.
  hz:
    image: hazelcast/hazelcast-enterprise:5.4
    environment:
      JAVA_OPTS: -Dhazelcast.config=/project/hazelcast.yaml
      HZ_LICENSEKEY: ${HZ_LICENSEKEY}
    volumes:
      - ".:/project"
    networks:
      - hznet
Test the Service
-
Open up the management center at http://localhost:8080. Open the SQL tab, then use the following query to obtain a valid card number.
SELECT * FROM cards LIMIT 10;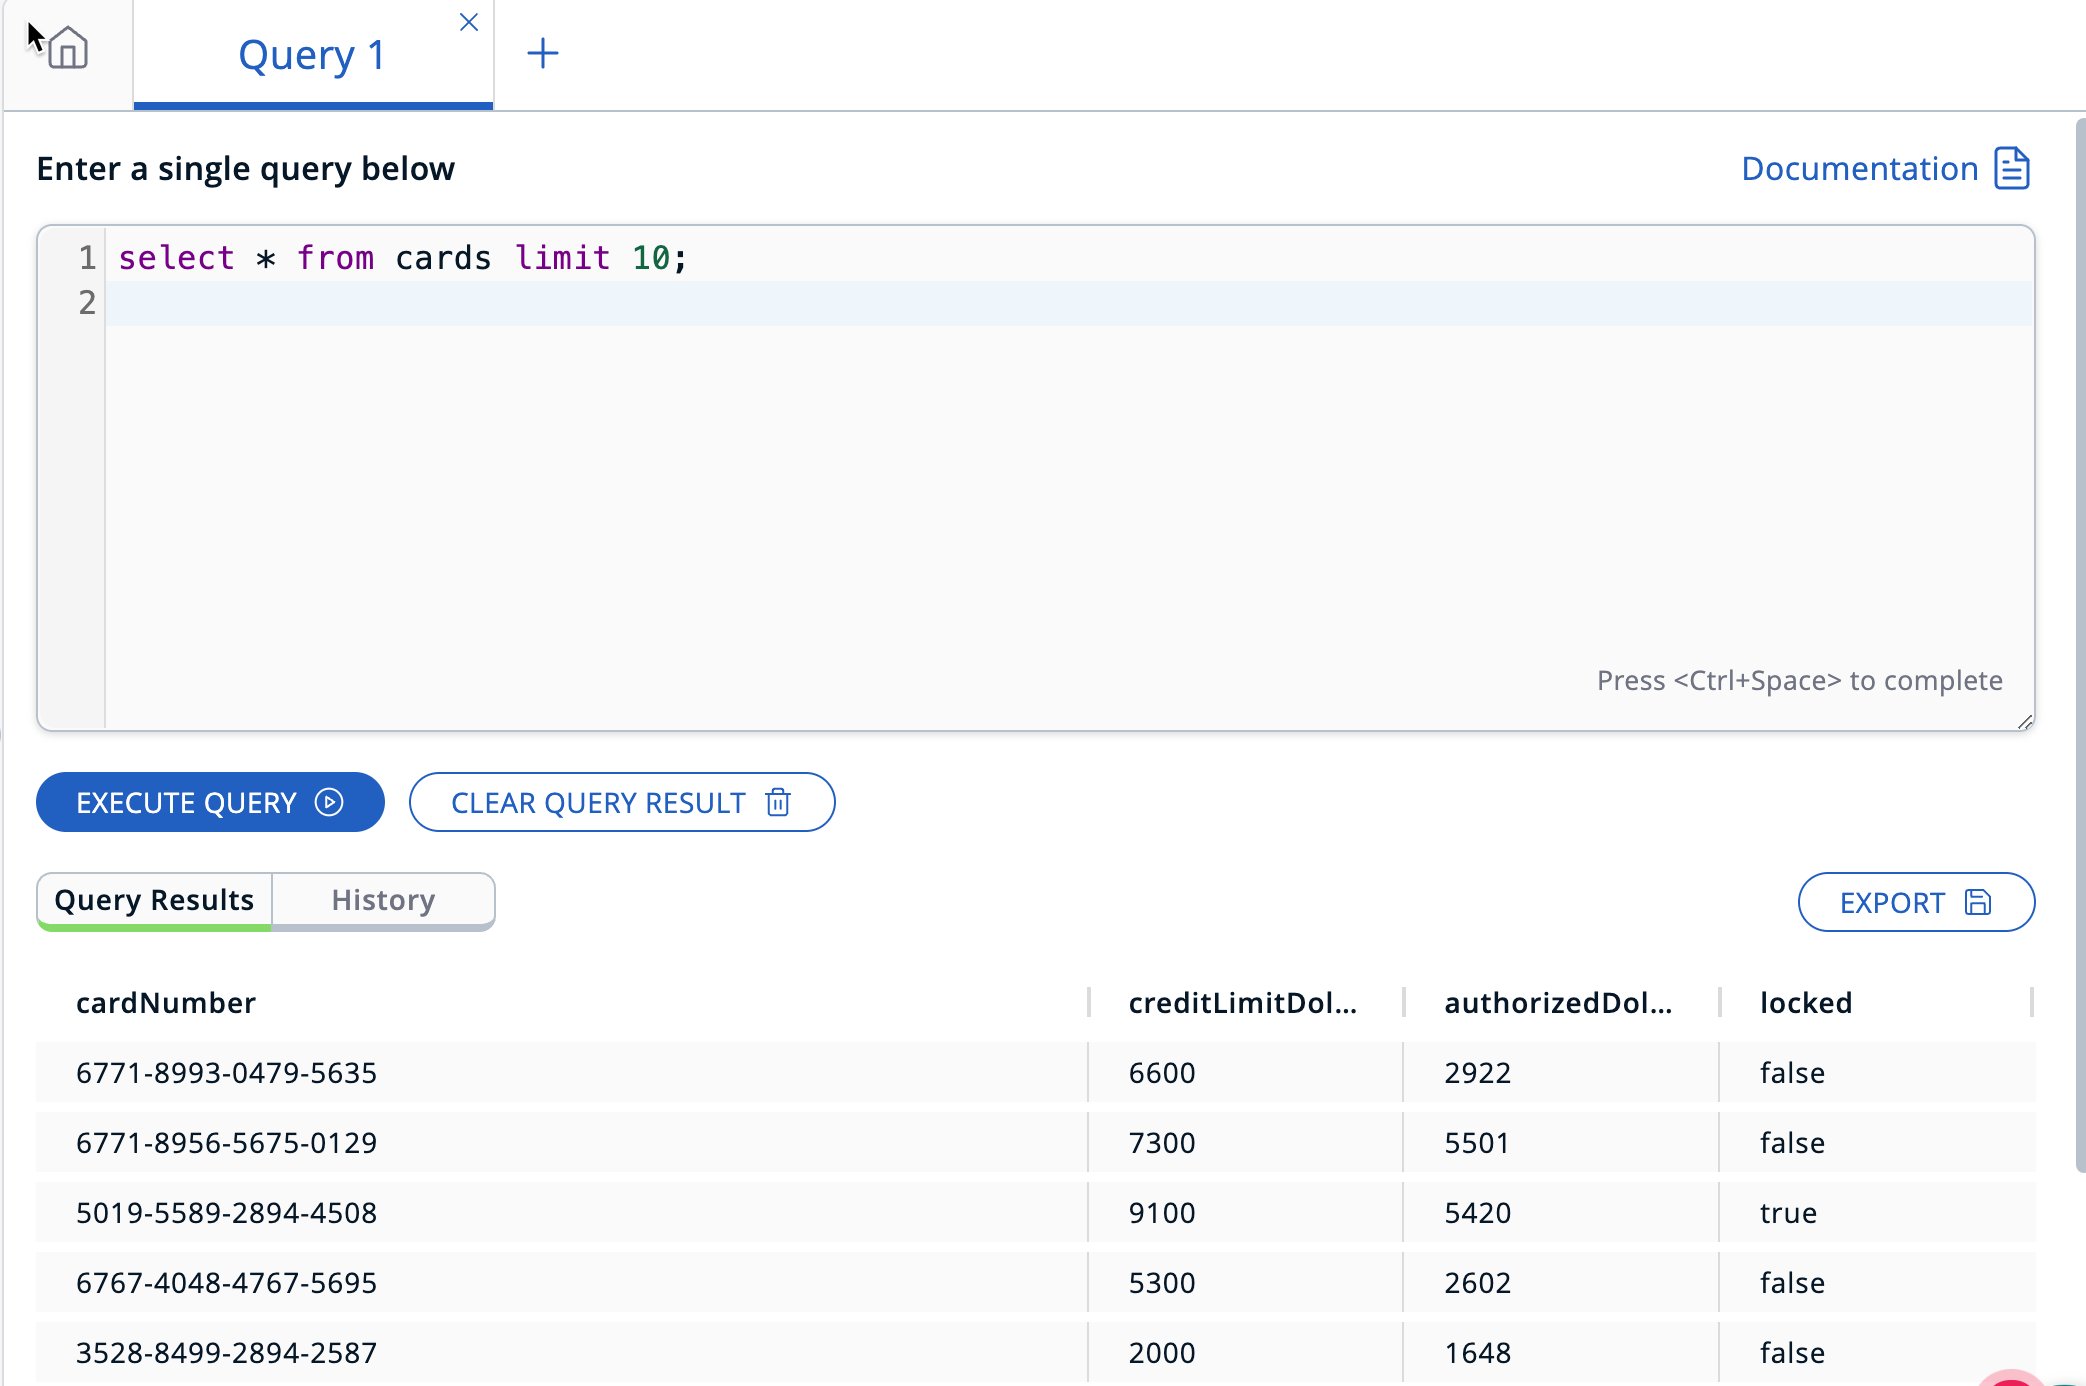
-
Using one of the card numbers, use Postman (or another API testing tool) to POST to http://localhost:8888/authorize. The request should include an "application/json" content-type header and the body should be similar to the one shown below.
{
    "card_number":"3529-4419-5553-3395",
    "transaction_id": 999,
    "amount": 25,
    "merchant_id": 99,
    "status": "NEW"
}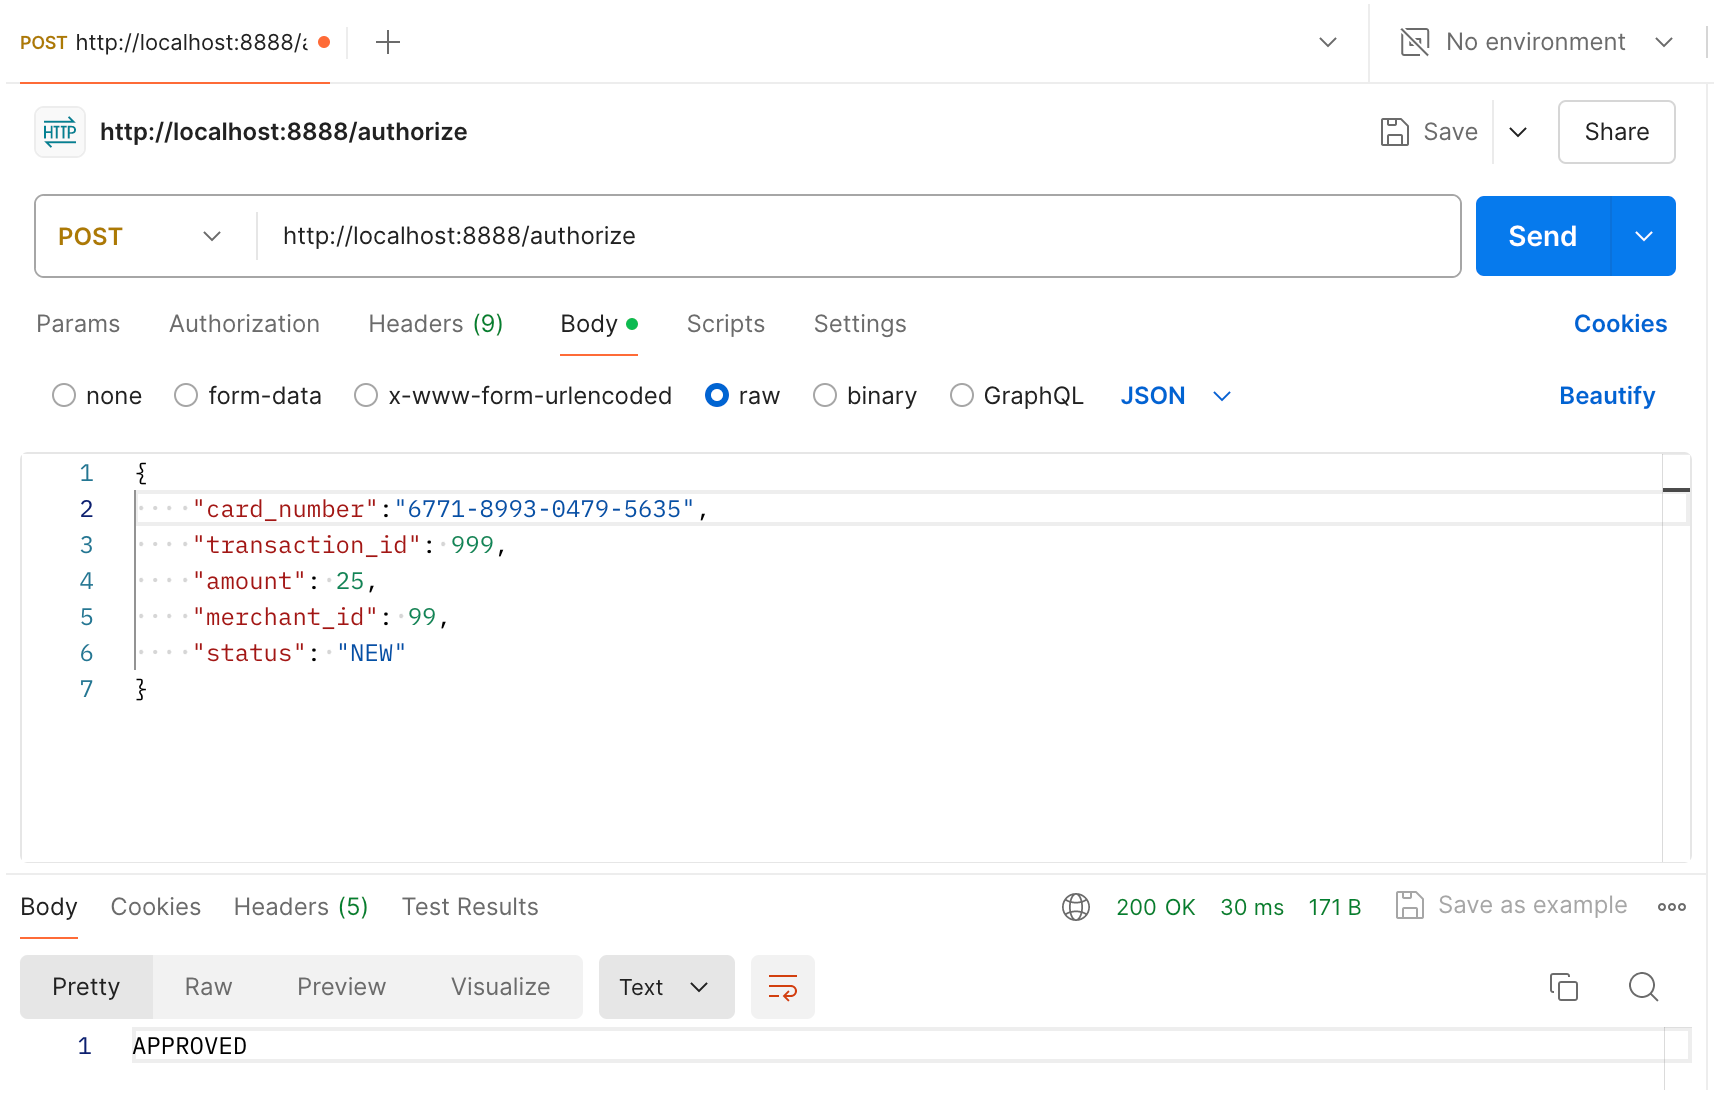
-
Verify that the available credit amount has been changed by the amount you charged in the transaction you just posted.
SELECT *
FROM cards
  WHERE cardNumber LIKE '6771-8993-0479-5635';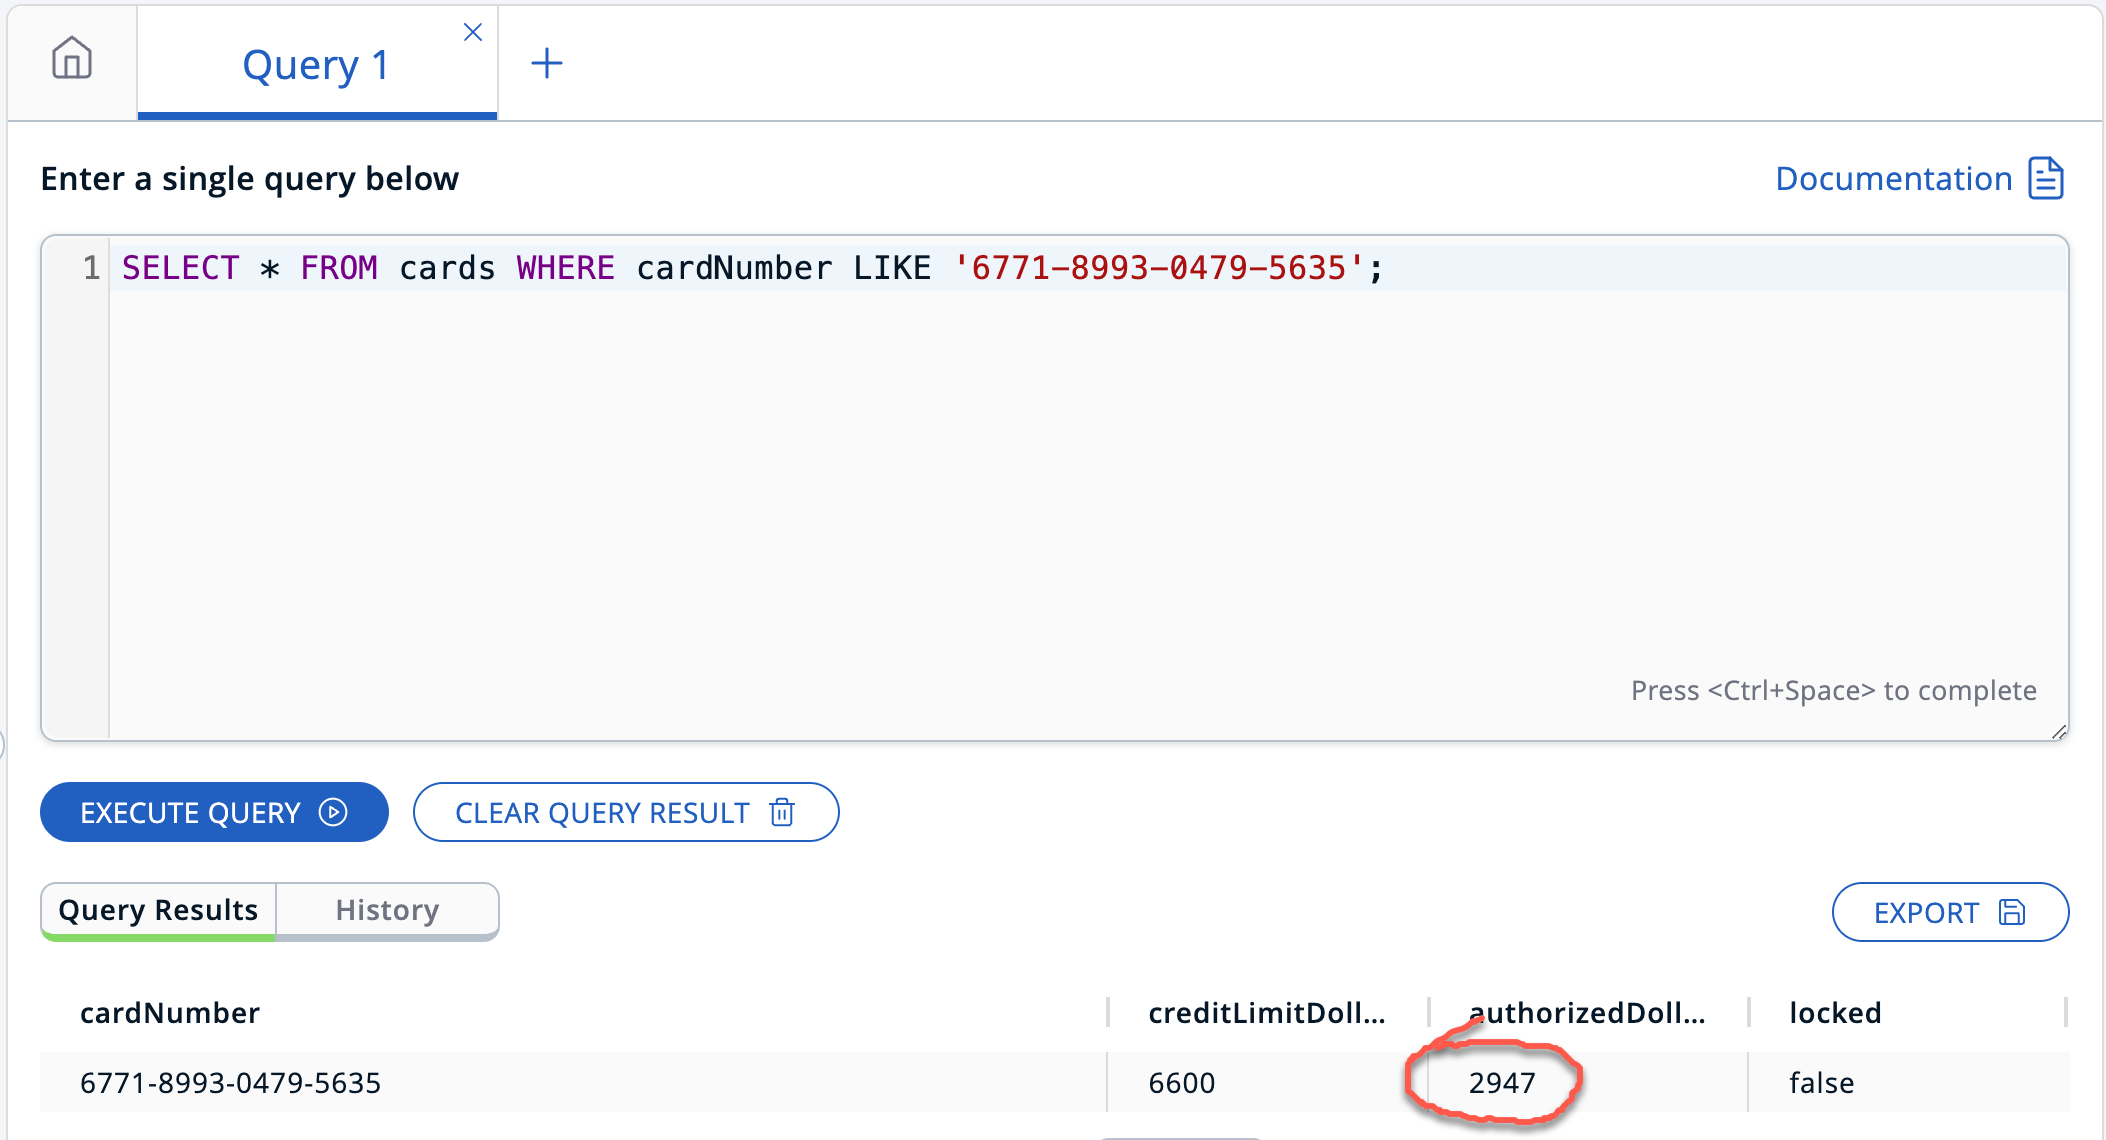
-
Pick one of the cards and set it to locked.
UPDATE cards SET locked = true WHERE cardNumber LIKE '6771-8993-0479-5635'; -
POST additional transactions with the following parameters:
-
A transaction over $5000.
-
A transaction over the available credit limit.
-
A transaction to the locked card.
Observe the output generated. With this version of the authorization code, you only get two possible responses: ACCEPTED and DECLINED_OVER_AUTH_LIMIT.
-
Update the Transaction Entry Processor
-
Edit the Transaction Entry Processor. You can un-comment the lines indicated, or you can make your own changes. Save your changes.
-
Rebuild and restart the service.
mvn clean install docker compose restart authorization-service -
POST the same transactions as before and observe the output changes.
Congratulations! You’ve just dynamically deployed an entry processor without disrupting ongoing operations.
Summary
User Code Namespaces provide isolation of Java classpath resources. In a cluster performing multiple tasks and operations, User Code Namespaces can provide resiliency by separating the control of those operations from the underlying Hazelcast system and from each other. Dynamic deployment allows you to then update those individual operations without affecting overall cluster behavior.