Learn how to use Hazelcast Eureka Discovery Plugin to discover Hazelcast members in a Eureka cluster.
Context
In this tutorial, you will learn how to use Spring Boot application with embedded Hazelcast, which presents forming a Hazelcast cluster using the Hazelcast Eureka plugin.
Before you Begin
Before starting this tutorial, make sure that you meet the following prerequisites:
-
JDK 17+
-
Apache Maven 3.2+
Introduction
The example project contains 4 projects that are related to each other. The projects are:
-
eureka-server- Eureka Server (not related to Hazelcast) -
hazelcast-only- Spring Boot Application which registers Hazelcast member in Eureka -
hazelcast-separate-client- Spring Boot Application which registers both Hazelcast member and the Spring Boot application itself in Eureka (Hazelcast member uses a separate Eureka Client than the application) -
hazelcast-metadata- Spring Boot Application which registers both Hazelcast member and the Spring Boot application itself in Eureka (Hazelcast member uses the same Eureka Client than the application)
To access example, clone the following repository:
git clone https://github.com/hazelcast/Hazelcast-Embedded-with-Eureka-discovery.git
cd Hazelcast-Embedded-with-Eureka-discovery/example/springboot-embedded
To start any interaction, you need to build all the projects with the following command.
$ mvn clean packageStep 1. Start Eureka server
To use Eureka discovery, you need first to start the Eureka server. Usually you would start multiple instances to provide high availability, but in this Code Sample a single localhost instance is good enough.
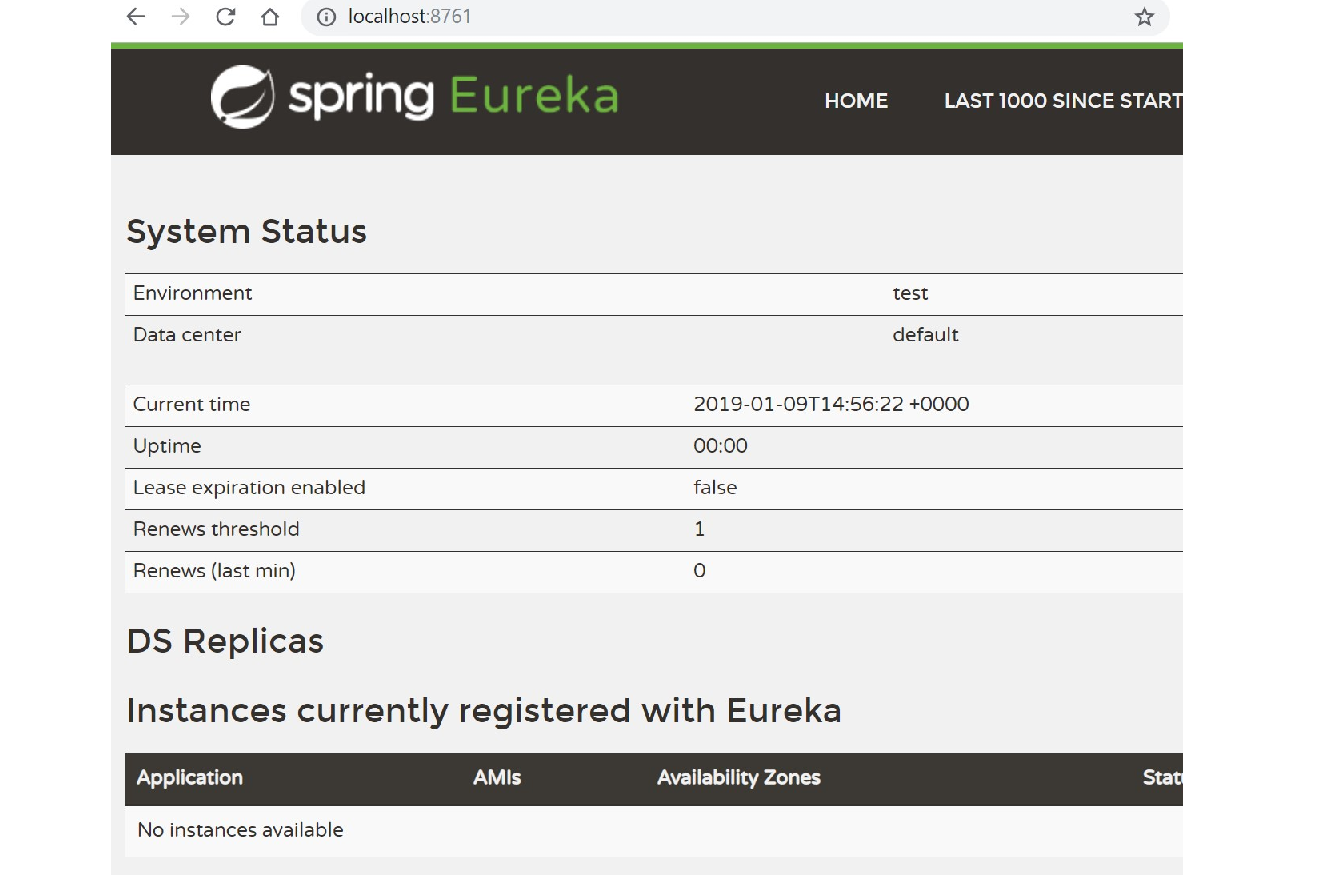
$ java -jar eureka-server/target/eureka-server-0.1-SNAPSHOT.jarYou can see that Eureka Sever started correctly by opening the browser at: http://localhost:8761.
Step 2.1. Hazelcast Only
The first project hazelcast-only presents how to use the Eureka-based Hazelcast discovery if you don’t need to register your Spring Boot application at the same time.
The simplest Hazelcast configuration looks as follows.
@Bean
public Config hazelcastConfig() {
    Config config = new Config();
    config.getNetworkConfig().getJoin().getMulticastConfig().setEnabled(false);
    config.getNetworkConfig().getJoin().getEurekaConfig()
          .setEnabled(true)
          .setProperty("self-registration", "true")
          .setProperty("namespace", "hazelcast");
    return config;
}
You also need to configure the Eureka Client specific properties in the eureka-client.properties file.
hazelcast.shouldUseDns=false
hazelcast.name=hazelcast-only
hazelcast.serviceUrl.default=http://localhost:8761/eureka/
With such configuration you can start two Spring Boot applications.
$ java -jar hazelcast-only/target/hazelcast-only-0.1-SNAPSHOT.jar --server.port=8081 --hazelcast.port=5703
$ java -jar hazelcast-only/target/hazelcast-only-0.1-SNAPSHOT.jar --server.port=8080 --hazelcast.port=5701
You should see in the logs that Hazelcast members formed a cluster together.
Members {size:2, ver:2} [
        Member [172.16.8.53]:5703 - 48d1ff51-f7d4-477d-aba6-05fea7ccce4c
        Member [172.16.8.53]:5701 - 800fad2b-3aaf-4f28-b944-e75572664e40 this
]
In the Eureka web console, you should see the following "HAZELCAST-ONLY" entries.
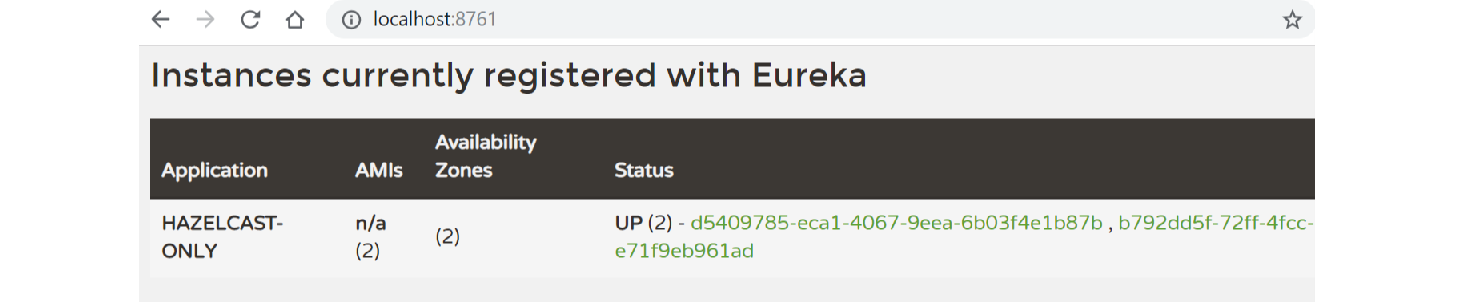
That is the simplest Eureka-based Hazelcast discovery. Sometimes, however, you need to have both your application and Hazelcast registered in Eureka.
Step 2.2. Hazelcast with separate Eureka Client
If you want your application to be registered in Eureka, the easiest way is to utilize distinct Eureka clients. With this approach, Hazelcast is registered independently and is viewable in Eureka as a distinct application.
To achieve this effect, your Hazelcast configuration is exactly the same as in the previous point, but you need to add the Eureka Client configuration for your Spring Boot Application. You can do it by adding @EnableDiscoveryClient to your Application class and defining the following bootstrap.properties file.
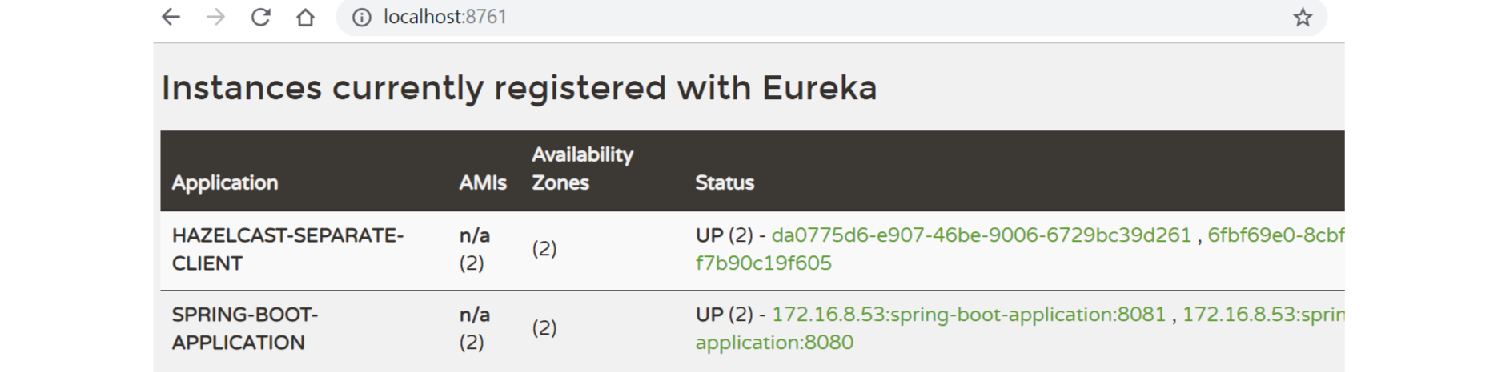
spring.application.name=spring-boot-applicationIn this case, Hazelcast will be registered under the name "HAZELCAST-SEPARATE-CLIENT" and the application will be registered under the name "SPRING-BOOT-APPLICATION".
$ java -jar hazelcast-separate-client/target/hazelcast-separate-client-0.1-SNAPSHOT.jar --server.port=8081 --hazelcast.port=5703
$ java -jar hazelcast-separate-client/target/hazelcast-separate-client-0.1-SNAPSHOT.jar --server.port=8080 --hazelcast.port=5701
Hazelcast members should form a cluster together as in the previous section. You should also see two separate entries in the Eureka web console.
Step 2.3. Hazelcast reusing Eureka Client (Metadata)
Sometimes, you may not want to have Hazelcast registered as a separate application in Eureka. After all, Hazelcast is not a separate application, but a library embedded inside your Spring Boot application. In that case the Eureka plugin provides a solution to store the information about Hazelcast host and port in the Metadata of the application itself, by using the same Eureka client as the application.
Change your Hazelcast configuration to include the metadata-related properties.
@Bean
public Config hazelcastConfig(EurekaClient eurekaClient) {
    EurekaOneDiscoveryStrategyFactory.setEurekaClient(eurekaClient);
    Config config = new Config();
    config.getNetworkConfig().getJoin().getMulticastConfig().setEnabled(false);
    config.getNetworkConfig().getJoin().getEurekaConfig()
          .setEnabled(true)
          .setProperty("self-registration", "true")
          .setProperty("namespace", "hazelcast")
          .setProperty("use-metadata-for-host-and-port", "true");
    return config;
}
With such configuration you can start two Spring Boot applications.
$ java -jar hazelcast-metadata/target/hazelcast-metadata-0.1-SNAPSHOT.jar --server.port=8081 --hazelcast.port=5703
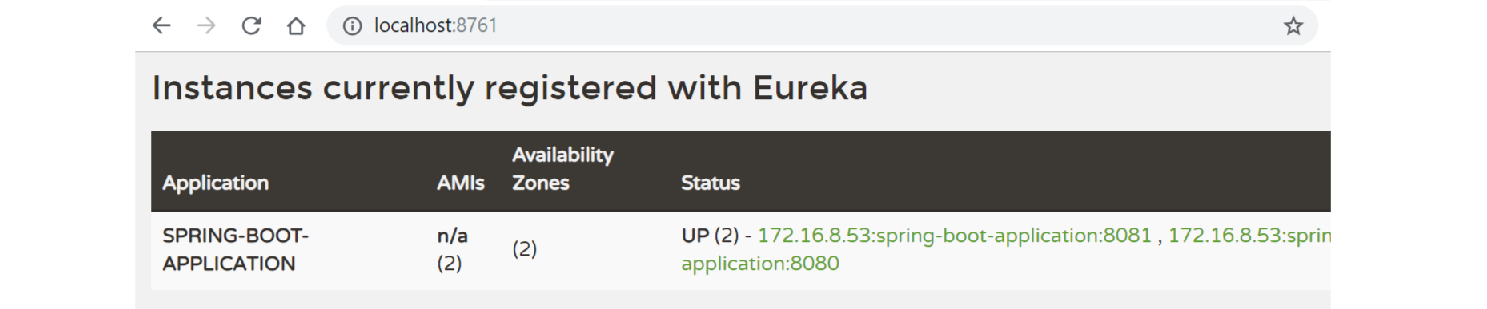
$ java -jar hazelcast-metadata/target/hazelcast-metadata-0.1-SNAPSHOT.jar --server.port=8080 --hazelcast.port=5701Hazelcast members should form a cluster together as in the previous section. You should also see two separate entries in the Eureka web console.
Step 3. Verifying the configuration
No matter which configuration you followed, you should have your Hazelcast cluster formed. Each Hazelcast instance is embedded into a web service with a few endpoints dedicated to operate on the Hazelcast data. We’ll use two of these endpoints to check that Hazelcast works correctly:
-
/put: inserts a key-value entry into Hazelcast -
/get: reads a value from Hazelcast by the key
Let’s first insert a key-value entry into the first web service.
$ curl -X PUT 'http://localhost:8080/put?key=some-key&value=some-value'Then, we can read the value from the second web service.
$ curl 'http://localhost:8081/get?key=some-key'
{"response":"some-value"}
We received the expected value from the second service, which means that the services work correctly and that the embedded Hazelcast instances formed a cluster together.
Summary
The tutorial provides instructions on how to integrate Hazelcast Embedded with Eureka discovery within a Spring Boot application.
It guides the reader through various methods of integrating Hazelcast and Eureka, from basic implementations to more complex configurations that store Hazelcast information within the metadata of the application itself.
See Also
-
See the Spring Boot documentation for more about using Hazelcast with Spring.